...
- Project: select the project you configured your Context for (Helpdesk). You can leave Project empty to use this context for all projects.
- Issue Type: select the type you configured above (Request). You can leave issue type empty, to use this context for all issue types.
- Template: select the template you created above (Helpdesk template)
- Notification template: select the notification you created above (Helpdesk Notifications).
- External Watchers Field: select the field you created for your Mail Handler, called External Participants.
- Sender Name Pattern: enter a name that appears in the emails as the sender, you can leave it empty.
- From Email Address: enter the email address you created for your mail handler (support@mycompany.com)
...
Congratulations, You are done. Your basic email support system is place and is ready to serve you.
Related documentation:
Gallery
| Gallery |
|---|
Related articles
...
| Redirect |
|---|
| Excerpt |
|---|
This tutorial explains the steps you need to follow in order to set up a typical email help desk using Email This Issue without JIRA Service Management. |
Use Case
The below tutorial covers the following use case:
- external customer reports a ticket via email, a new issue is created from email
- service management user requests more information form the customer by commenting the issue, customer is notified
- customer replies to the email, the issue is commented, old content from the email is stripped out
- service management user resolves and closes the issue, customer is notified.
Step-by-step guide
There two major aspects you must configure to implement the above use case:
- Mail Handler
- Event Notifications
Configure Mail Handler to Process Emails
...
- Name: give a descriptive name, like "MyCompany Support Handler"
- Server: select the email account you configured above
- Handler: select Email This Issue Mail Handler
- Project: select the project in which you want to track your ticket, let's say the project is: Helpdesk
- Issue Type Select the type you want to use to represent a ticket, e.g. Request
- Specify a default reporter: a user who has Create Issue and Add Comment permissions in the project
- Leave other settings with the default value
...
In Split Regex, enter
| No Format |
|---|
/From: |___.|On .wrote:|----Orig.|On .(JIRA)./ |
...
At the end, your Mail Handler Context should look like this:
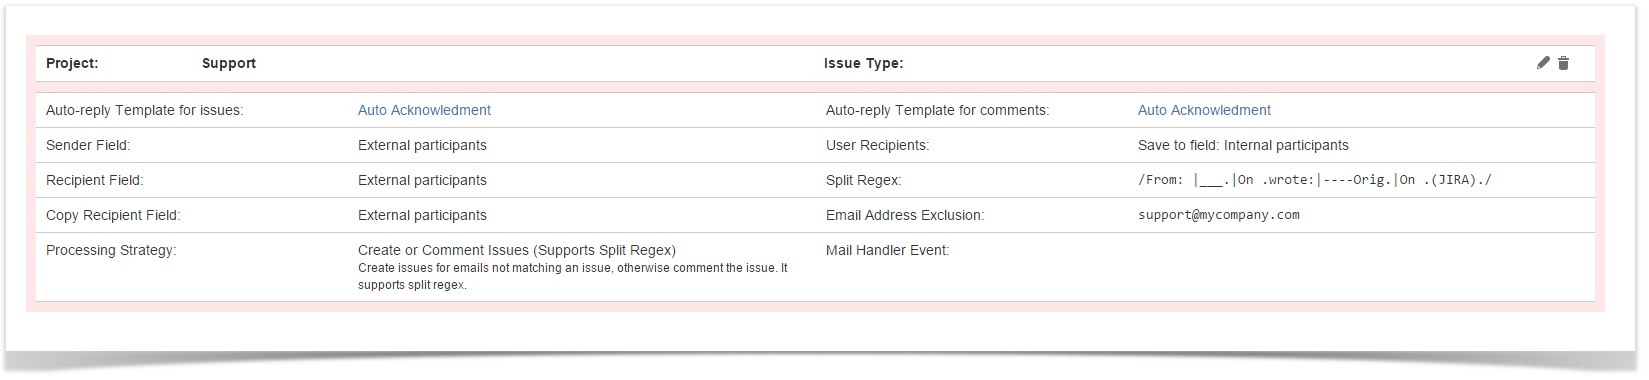
You have now prepared Email This Issue to process incoming support emails.
See more details on Mail Handlers.
Configure Event Notifications
...
- Leave the JQL filter empty now
- In the dropdown of Recipients (To), select the fields External Participants, Internal Participants.
- Add users and/or email addresses
- Configure Copy Recipients and Blind Copy Recipients (must be enabled separately) according to your needs
- In Content, enter your email subject and body according to your needs. These values will be combined with the Template to build the emails content and layout.
- Also select an attachment rule, to specify how attachments should be (or should not be) added to the email
- In Options, select HTML email type and other options as you whish.
...
|