Use Case
The below tutorial covers the following use case:
- external customer reports a ticket via email, a new issue is created from email
- service management user requests more information form the customer by commenting the issue, customer is notified
- customer replies to the email, the issue is commented, old content from the email is stripped out
- service management user resolves and closes the issue, customer is notified.
Step-by-step guide
There two major aspects you must configure to implement the above use case:
- Mail Handler
- Event Notifications
Configure Mail Handler to Process Emails
- Go to JIRA Administration / Incoming Mail
- Add an IMAP or POP connection to an email account, let's say support@mycompany.com.
- Add a Mail Handler with the below parameters:
- Name: give a descriptive name, like "MyCompany Support Handler"
- Server: select the email account you configured above
- Handler: select Email This Issue Mail Handler
- Project: select the project in which you want to track your ticket, let's say the project is: Helpdesk
- Issue Type Select the type you want to use to represent a ticket, e.g. Request
- Specify a default reporter: a user who has Create Issue and Add Comment permissions in the project
- Leave other settings with the default value
- Go to Administration / Issues, add a text custom field, call it External Participants, add one Multi-User picker field, called Internal Participants. Make sure the fields are accessible in the project and issue type you configured above.
- Go to JETI Administration / Templates (JIRA_BASE_URL/secure/admin/jeti/jetiTemplates.jspa)
- Click Add to add a new Template
- Give it a name: Auto Acknowledment
- You can customize your template now.
- Click Save at the bottom of the page to persist your template.
- Go to JETI Administration / Mail Handlers (JIRA_BASE_URL/secure/admin/jeti/jetiAutoReply.jspa)
- Click Add to add a Mail Handler Context
- Set the attributes of the Mail Handler Context:
- Project: select the project you configured your mail handler for (Helpdesk). You can leave Project empty to use this context for all projects.
- Issue Type: select the type you configured above (Request). You can leave issue type empty, to use this context for all issue types.
- Select the Email Processing Strategy, most typically Create or Comment or Link Issues (Supports Split Regex)
- In Acknowledge New Issues and Acknowledge New Comments, select the Auto Acknowledge template you created above. This will make sure that email senders will get an instant feedback from your JIRA system, that their emails have been processed. The email will contain the issue key as a reference number.
- In User Recipients, select "Save to multi user picker field" and select the above created field: Internal Participants.
- In Sender Field, select the "External Participants" field
- In Recipient Field and Copy Recipient Field, select the "External Participants" field
- Email Address Exclusion: enter the email address this Mail Handler is listening on (you configured it in step 2 above).
In Split Regex, enter
/From: |___.|On .wrote:|----Orig.|On .(JIRA)./
- Click Save to persist your Mail Handler Context.
At the end, your Mail Handler Context should look like this:
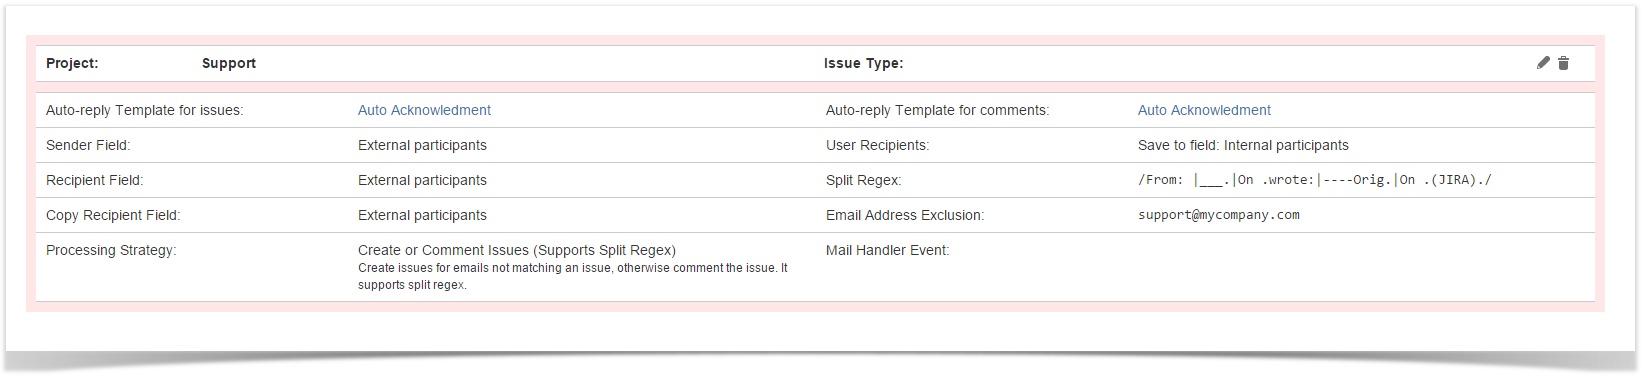
You have now prepared Email This Issue to process incoming support emails.
See more details on Mail Handlers.
Configure Event Notifications
- Go to JETI Administration / Templates (JIRA_BASE_URL/secure/admin/jeti/jetiTemplates.jspa)
- Click Add to add a template for your outgoing emails, base your template on Default and call it Helpdesk Template
- Customize the template according to your needs
- Click Save at the bottom of the page to persist your template.
- Go to JETI Administration / Notifications (JIRA_BASE_URL/secure/admin/jeti/jetiNotifications.jspa)
- Click Add to create a new Notification Template, call it anything, e.g. Helpdesk Notifications
- Now you are in the Notification Events page.
- Click Add to add an issue event to the Notifcation.
- Select an event type and the template, you created above: Helpdesk Template.
- Now you are in the page configuring the event.
- Leave the JQL filter empty now
- In the dropdown of Recipients (To), select the fields External Participants, Internal Participants.
- Add users and/or email addresses
- Configure Copy Recipients and Blind Copy Recipients (must be enabled separately) according to your needs
- In Content, enter your email subject and body according to your needs. These values will be combined with the Template to build the emails content and layout.
- Also select an attachment rule, to specify how attachments should be (or should not be) added to the email
- In Options, select HTML email type and other options as you whish.
- Click Save to persist your settings
- Repeat the above steps from Step 8 to add all your events.
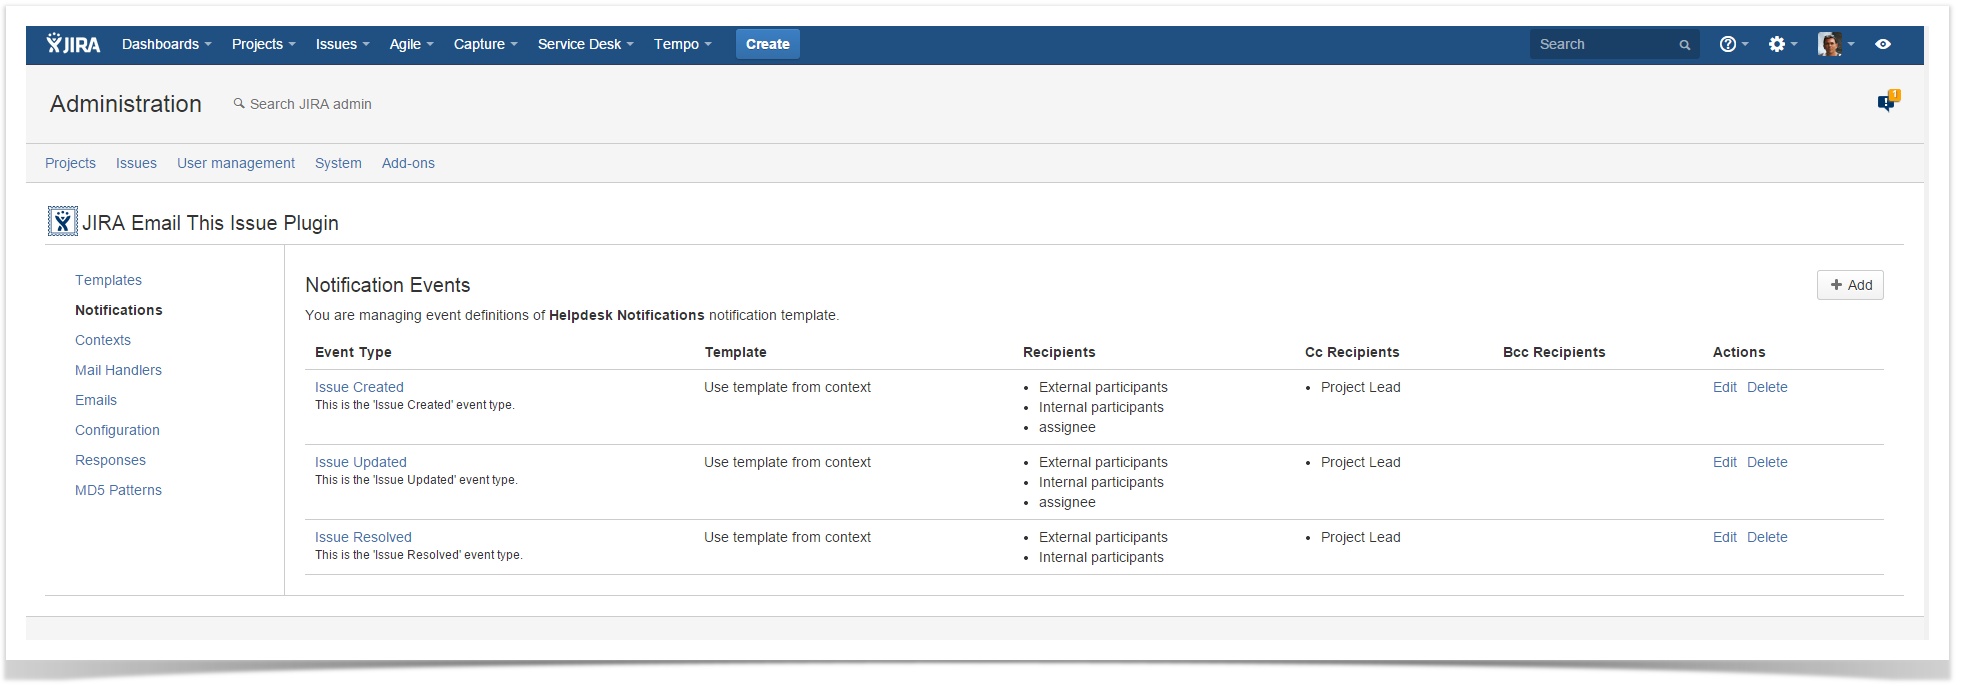
- Once completed, your Notifications will look like this:
- Go to JETI Administration / Contexts (JIRA_BASE_URL/secure/admin/jeti/jetiProjects.jspa)
- Click Add to add a new context with the following attributes:
- Project: select the project you configured your Context for (Helpdesk). You can leave Project empty to use this context for all projects.
- Issue Type: select the type you configured above (Request). You can leave issue type empty, to use this context for all issue types.
- Template: select the template you created above (Helpdesk template)
- Notification template: select the notification you created above (Helpdesk Notifications).
- External Watchers Field: select the field you created for your Mail Handler, called External Participants.
- Sender Name Pattern: enter a name that appears in the emails as the sender, you can leave it empty.
- From Email Address: enter the email address you created for your mail handler (support@mycompany.com)
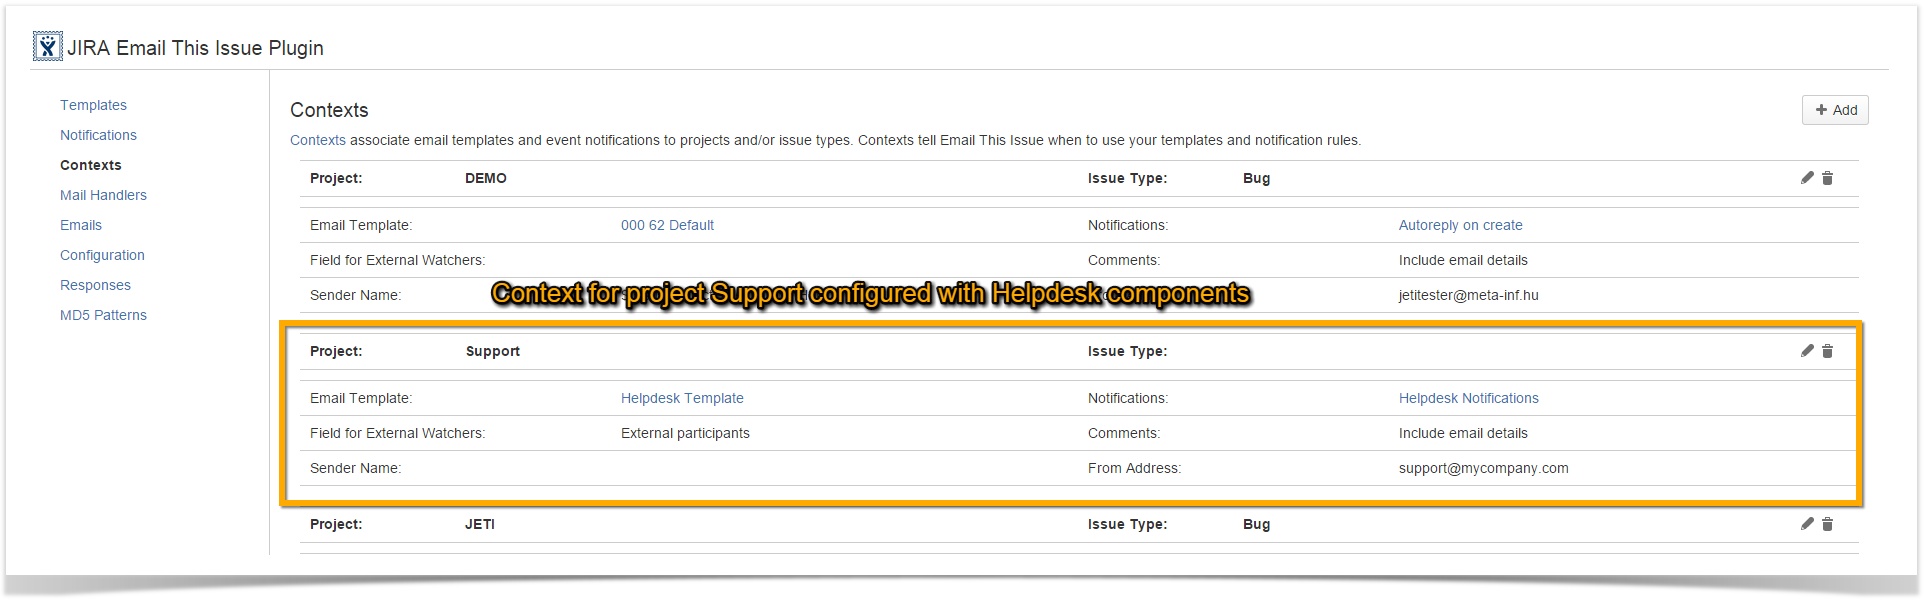
- Here your Context should look like:
Congratulations, You are done. Your basic email support system is place and is ready to serve you.
Related documentation:
Gallery
| There are no images attached to this page. |
Related articles