Note that the settings you could configure under General Configuration on Server is not available in a single menu but can be configured in different menus on Cloud.
This section describes how to migrate recipient restrictions from Server to Cloud.
On the Server interface, go to General Configuration under the SETTINGS menu item on the sidebar to display the Restrictions panel.

On the Cloud interface, go to Recipient Restrictions under the Outgoing Mails configuration tab.

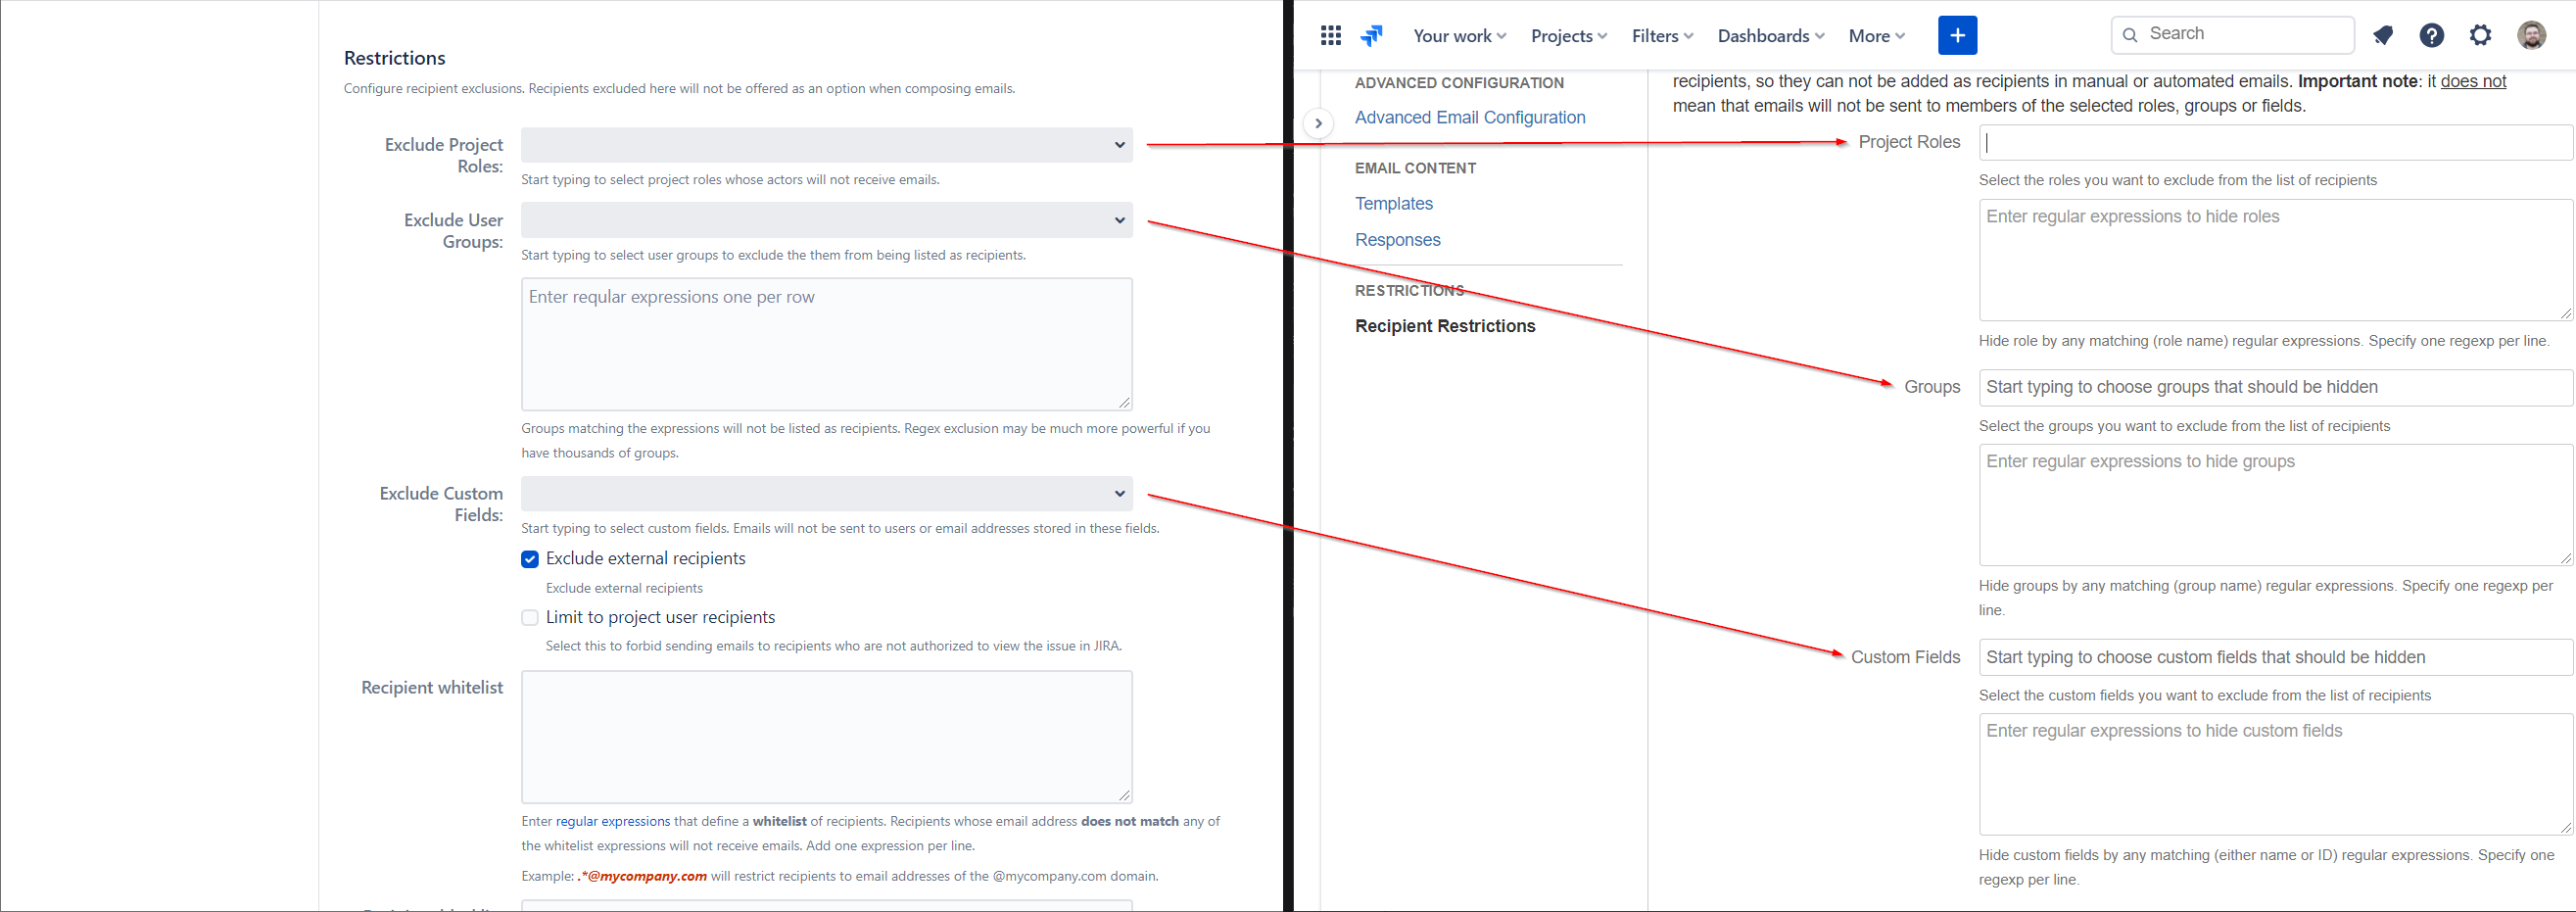
Copy and paste the content from the Restrictions panel on Server to the Hide recipients panel on Cloud. As shown in the image below, make sure to copy and paste the content of the following fields:
Exclude Project Roles → Project Roles
Exclude User Groups → Groups
Exclude Custom Fields → Custom Fields
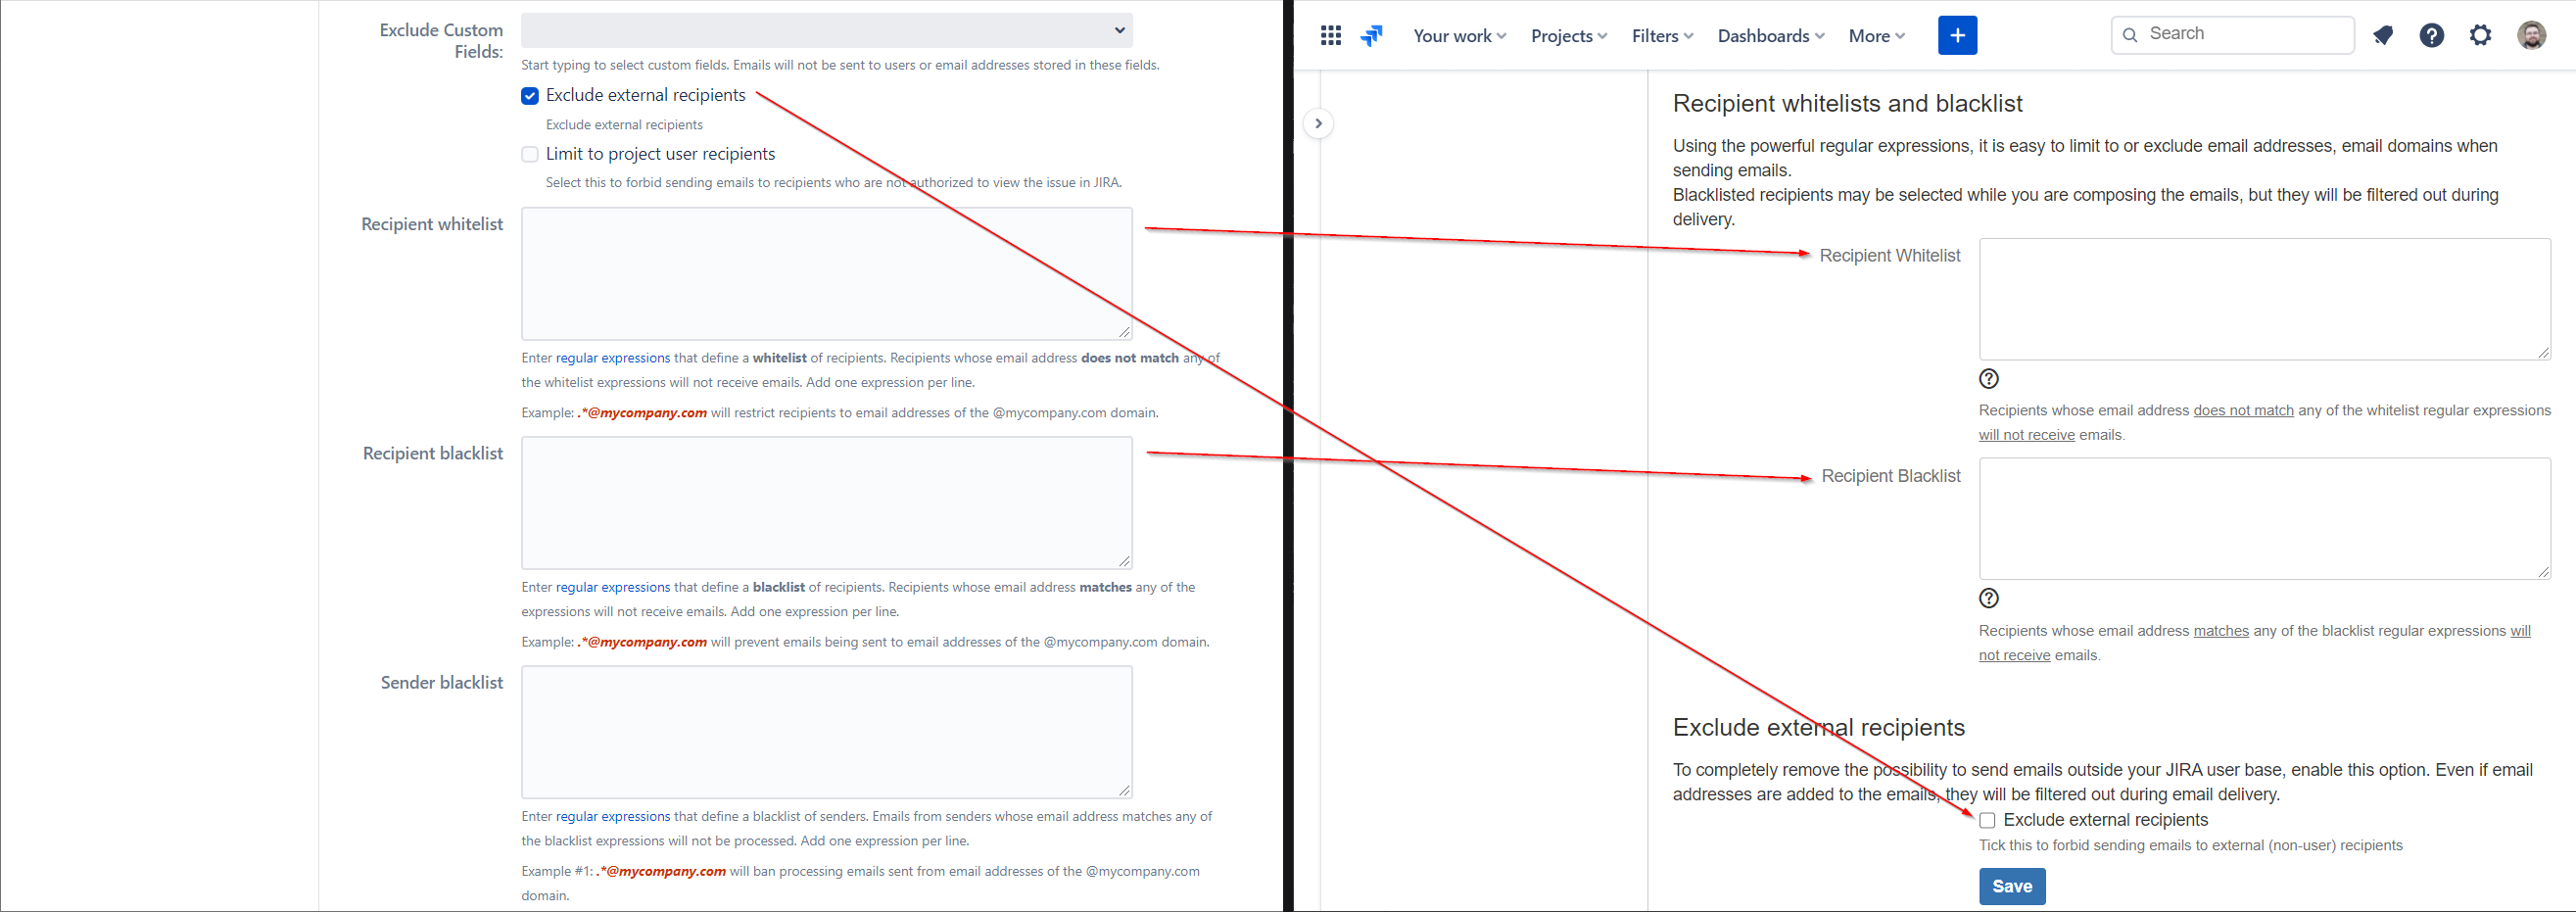
Copy and paste the content from the Restrictions panel on Server to the Recipients whitelists and blacklist and the Exclude external recipients panels on Cloud. As shown in the image below, make sure to copy and paste the content of the following fields. Note that the Limit to project user recipients feature is not available on Cloud.
Recipient whitelist → Recipient Whitelist
Recipient blacklist → Recipient Blacklist
Exclude external recipients → Exclude external recipients
Save your settings.
Your restrictions have been set.
For more information, see:
Server documentation: General Configuration