SINCE VERSION 8.0.0
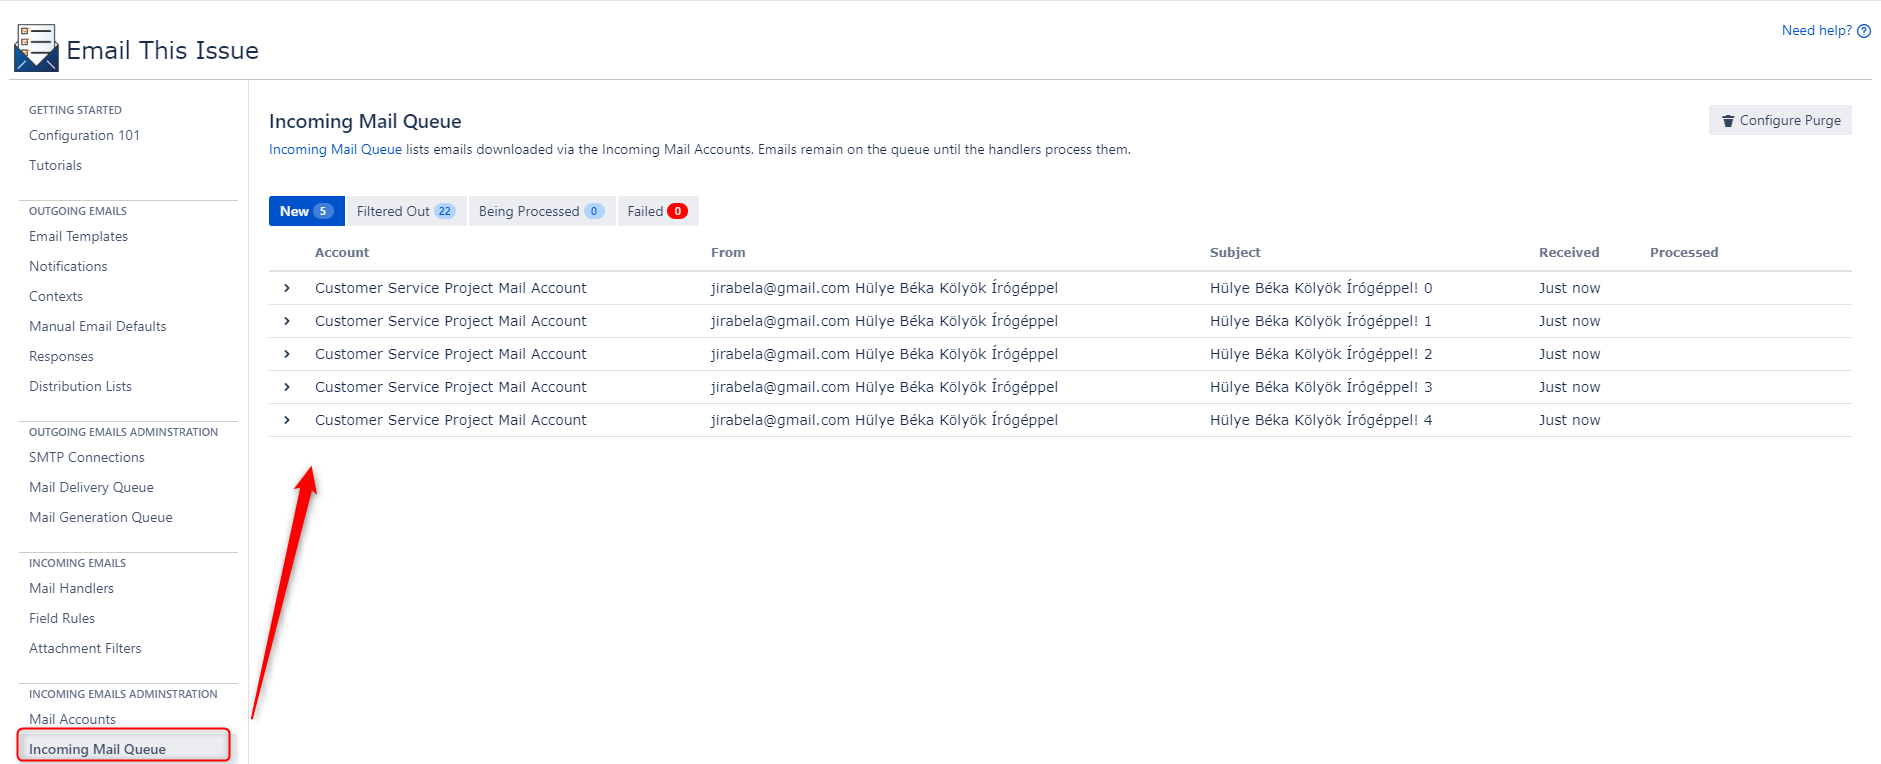
The Incoming Mail Queue provides ways to look into the internal status of the mailbox connections. You can access the Incoming Mail Queue from the app's administration page.
The Incoming Mail Queue is related to Email This Issue's mail account connections, it does not show details of Jira Mail Services (connections configured in Jira's Incoming Mail page).
Different Views in the Queue
The Incoming Mail Queue has different views related to the phases of an email being processed:
| New → | Filtered Out → | Being Processed → | Failed |
|---|---|---|---|
| this tab displays emails that have been successfully downloaded | this tab displays emails that were downloaded but all related mail handlers have filtered them out, so they are not being processed | this tab displays emails that are being handled by our mail handlers | this tab displays emails that were downloaded but the mail handler failed to process them due to some reason |
New Emails
The New Emails queue displays all emails that were downloaded from one of the enabled mail accounts. Emails are marked with the status: NEW are downloaded successfully but not yet passed to the mail handlers. Email this issue stores downloaded emails in the database before it passes them to the mail handlers.
Filtered Emails
The Filtered Out queue displays all emails that were downloaded and passed to the mail handlers (attached to the mail accounts), but all of these handlers have refused to process the email. Details of the reason (why the email has been filtered our) can be seen in the Incoming Mail Log.
Emails that are marked with the status: FILTERED remain in the queue permanently if they are not removed.
Emails Being Processed
The Being Processed queue displays emails that were downloaded from one of the mail accounts and a handler accepted them for processing (they are being processed).
Processing an email usually does not take long, however, it highly depends on the configuration of the mail handler. Processing an email should not take more than 1-2 seconds in a well-performing system.
Once the email is successfully processed, it is removed from the queue and the database in order to keep the DB as small as possible.
If an error occurs during the process, the email is moved to the Failed queue.
Failed Emails
The Failed queue displays emails that the handlers could not successfully process. Error details can be found in the Incoming Mail Log.
Emails that are marked with the status: FAILED remain in the queue permanently if they are not removed.
Email Details in the Queue
In all views, the queue shows the below details of the email items:
- Account: the incoming mail account which downloaded the email
- From: the sender of the email (email address and in some cases name as well)
- Subject: the subject of the email
- Received: date and time of when the email was downloaded
- Processed: date and time of when the email was last submitted for processing by the handlers
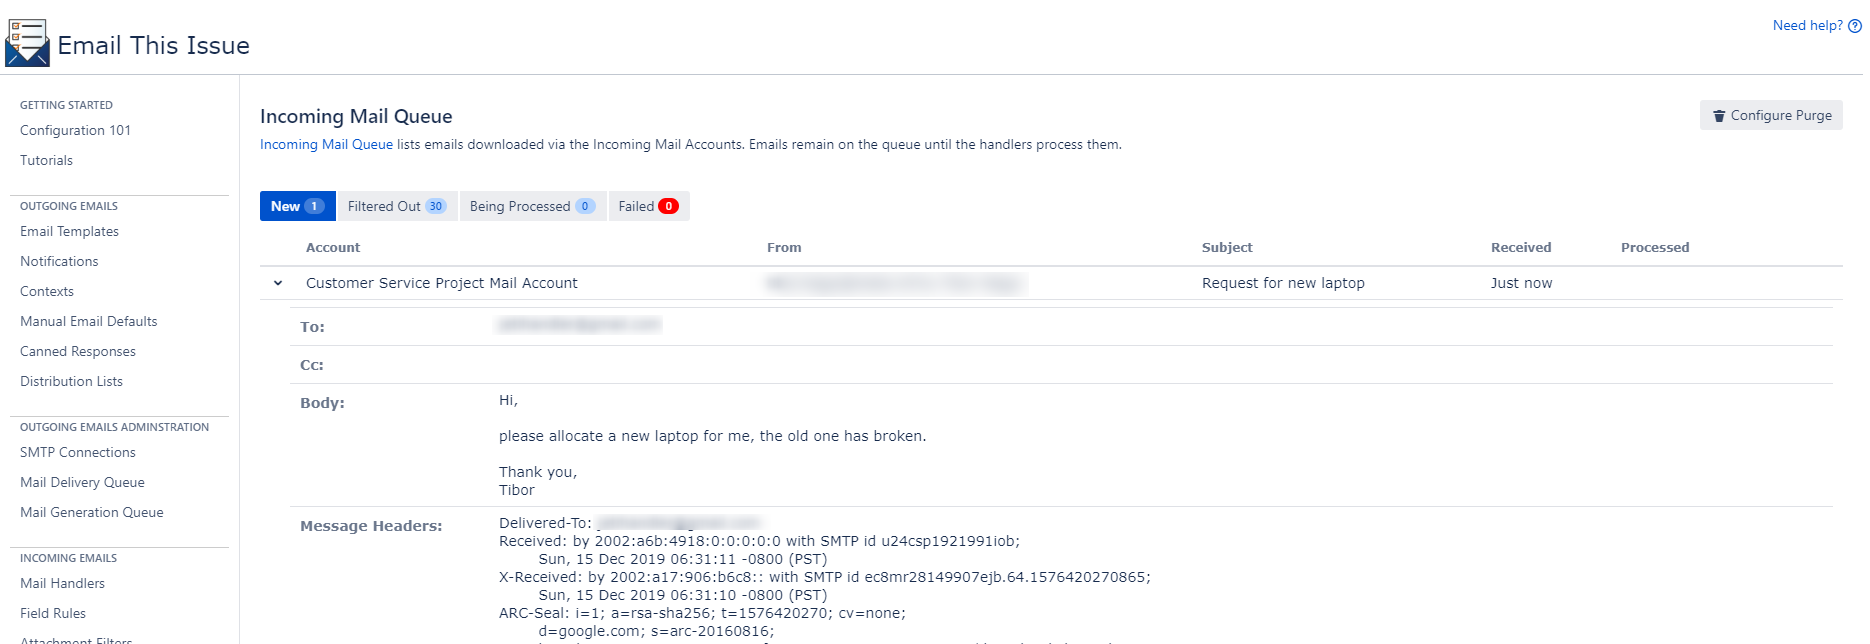
To reveal more details, click the > icon:
- To, Cc: recipients of the email
- Body: mail body in text format
- Message Headers: all headers hidden in the email
Removing Emails from the Incoming Mail Queue
Emails of the Filtered Out and Failed queues remain in the queue permanently. This poses a risk of increasing the size of the database dramatically.
To prevent this you can remove emails from these queues in one of the following ways:
- manually remove a single email
- manually remove multiple emails that are over a certain age
- schedule an automatic purge process to bulk remove items that are over a certain age
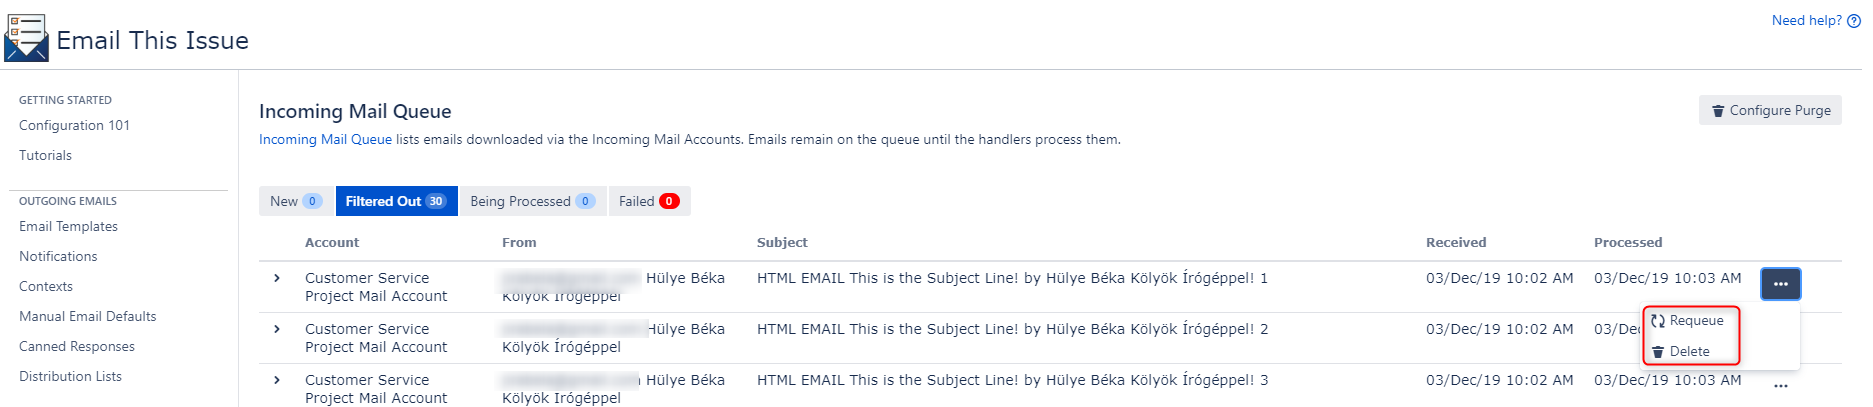
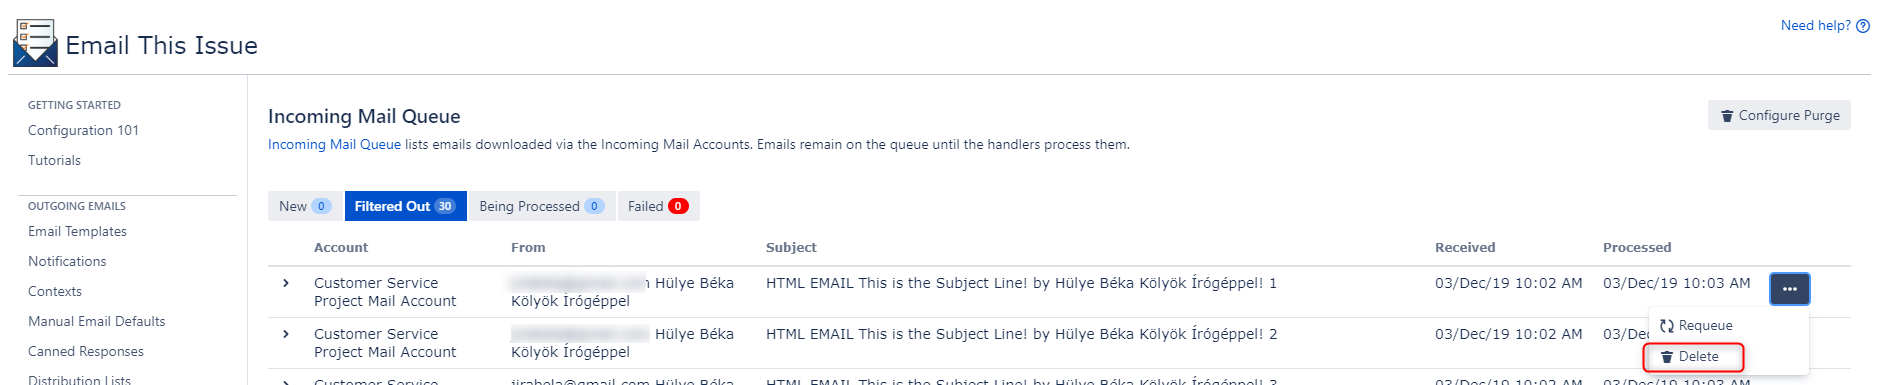
Delete a Single Email from the Queue
You can use the Delete button to remove a single email from a queue:
Manual Purge
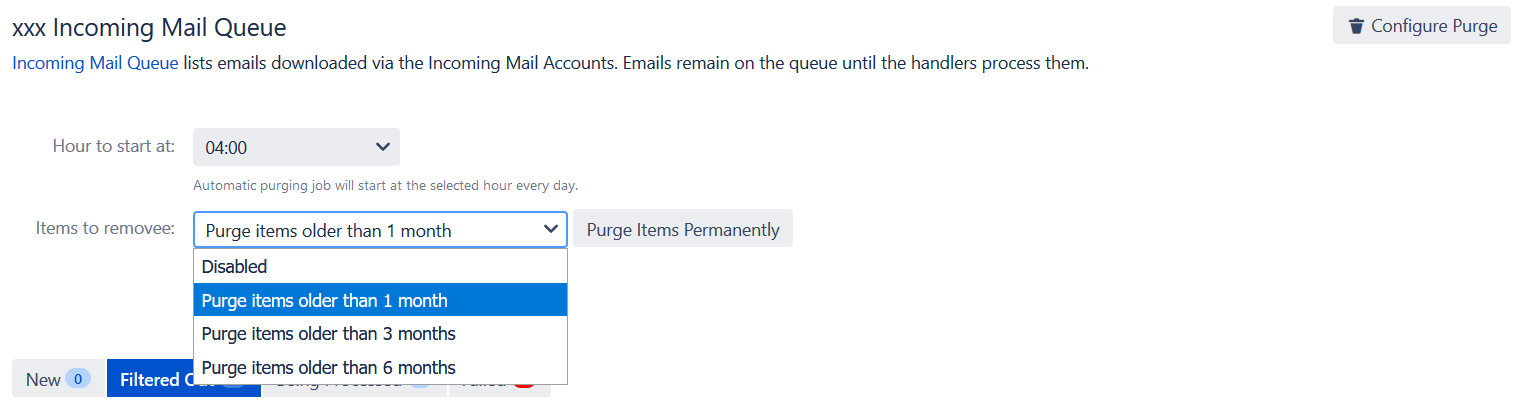
To remove multiple items manually, click on the Configure Purge button. This opens a form where the relevant field is Items to remove. This allows you to select the age of the mail items to remove. Options include emails older than 1 month, 3 months, 6 months:
To actually remove the mail items, click the Purge Items Permanently button.
Do not click on Save Settings if you do not want to schedule an automatic purge.
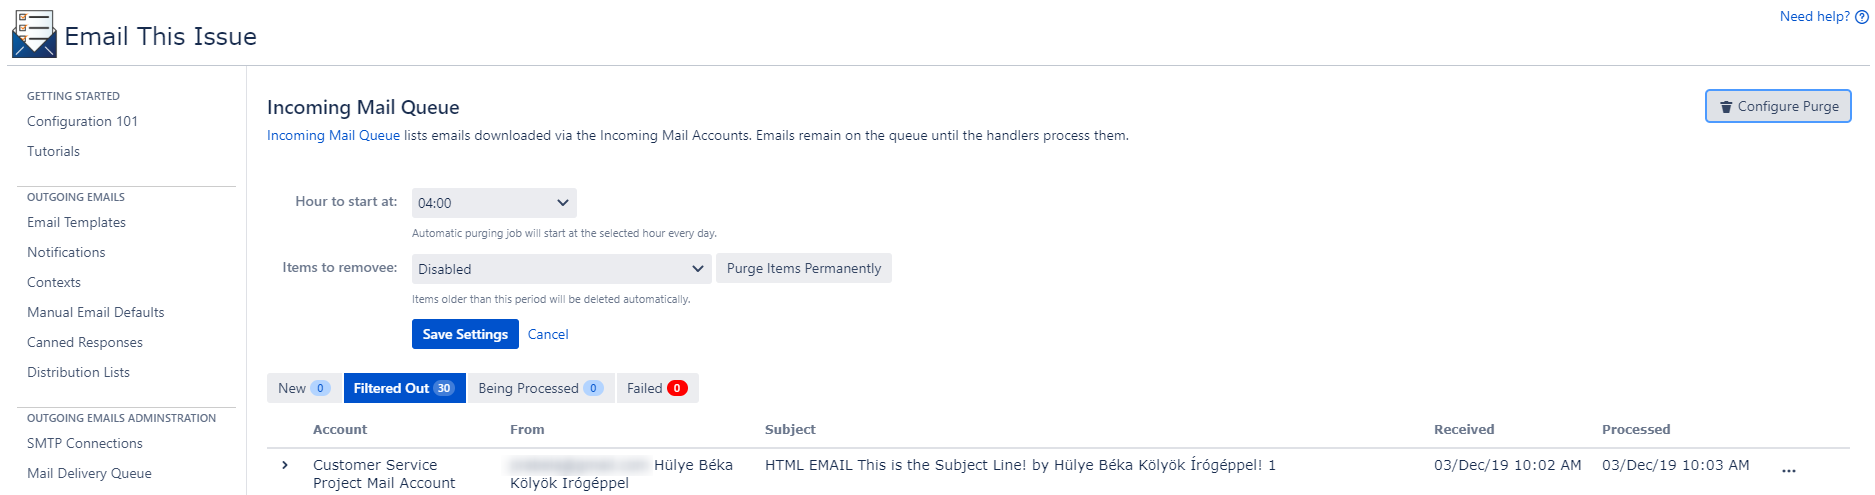
Automatic Purge
To remove items automatically, click on the Configure Purge button.
This opens a form where there are two relevant fields to set are:
- Hour to start at: specifies when the purge job is carried out every day
- Items to remove: allows you to select the age of the mail items to remove. Options include emails older than 1 month, 3 months, 6 months.
To schedule the job, click Save Settings.