Event Notifications in Jira
Jira Notifications are hard to customize and Jira does not support different mail templates per project, issue type, or event. It does not allow you to address notification emails to external email addresses stored in custom fields, and it does not allow adding attachments to the outgoing emails.
Email This Issue resolves these shortcomings as it allows you to:
- easily develop different templates for any combination of project, issue type, and event
- address notification emails to external external recipients without access to your Jira instance
- easily configure customizable notification schemes (a.k.a Notification Templates)
- add issue attachments to outgoing notification emails
- Send different emails to different recipients upon a single event
- Configure Service Management Customer Notifications separately to Event Notifications
Event Notifications in Email This Issue
Event Notifications are automated emails that are sent when triggered by events. It is as easy to set up Email This Issue notifications as it is to set up Jira Project Notification Schemes, but our built-in solution offers more than Jira's.
Event Notifications are grouped in Notification Templates. These groups contain event notifications that may be triggered altogether or separately.
Notification templates are not connected to certain scopes by default; they need to be mapped to Contexts.
There are four steps to setting up a set of notifications:
- Create customizable email templates in Email This Issue (this is not a notification template, this is the look-and-feel of your outgoing email)
- Add a Notification Template (i.e. Notification Scheme)
- Configure the notifications based on events within the Notification Template (these are the events that the outgoing email will be triggered by, such as 'Issue updated' or 'Issue created')
Map the Notification Template to a project, issue type, JQL, or a combination of these in the Context settings
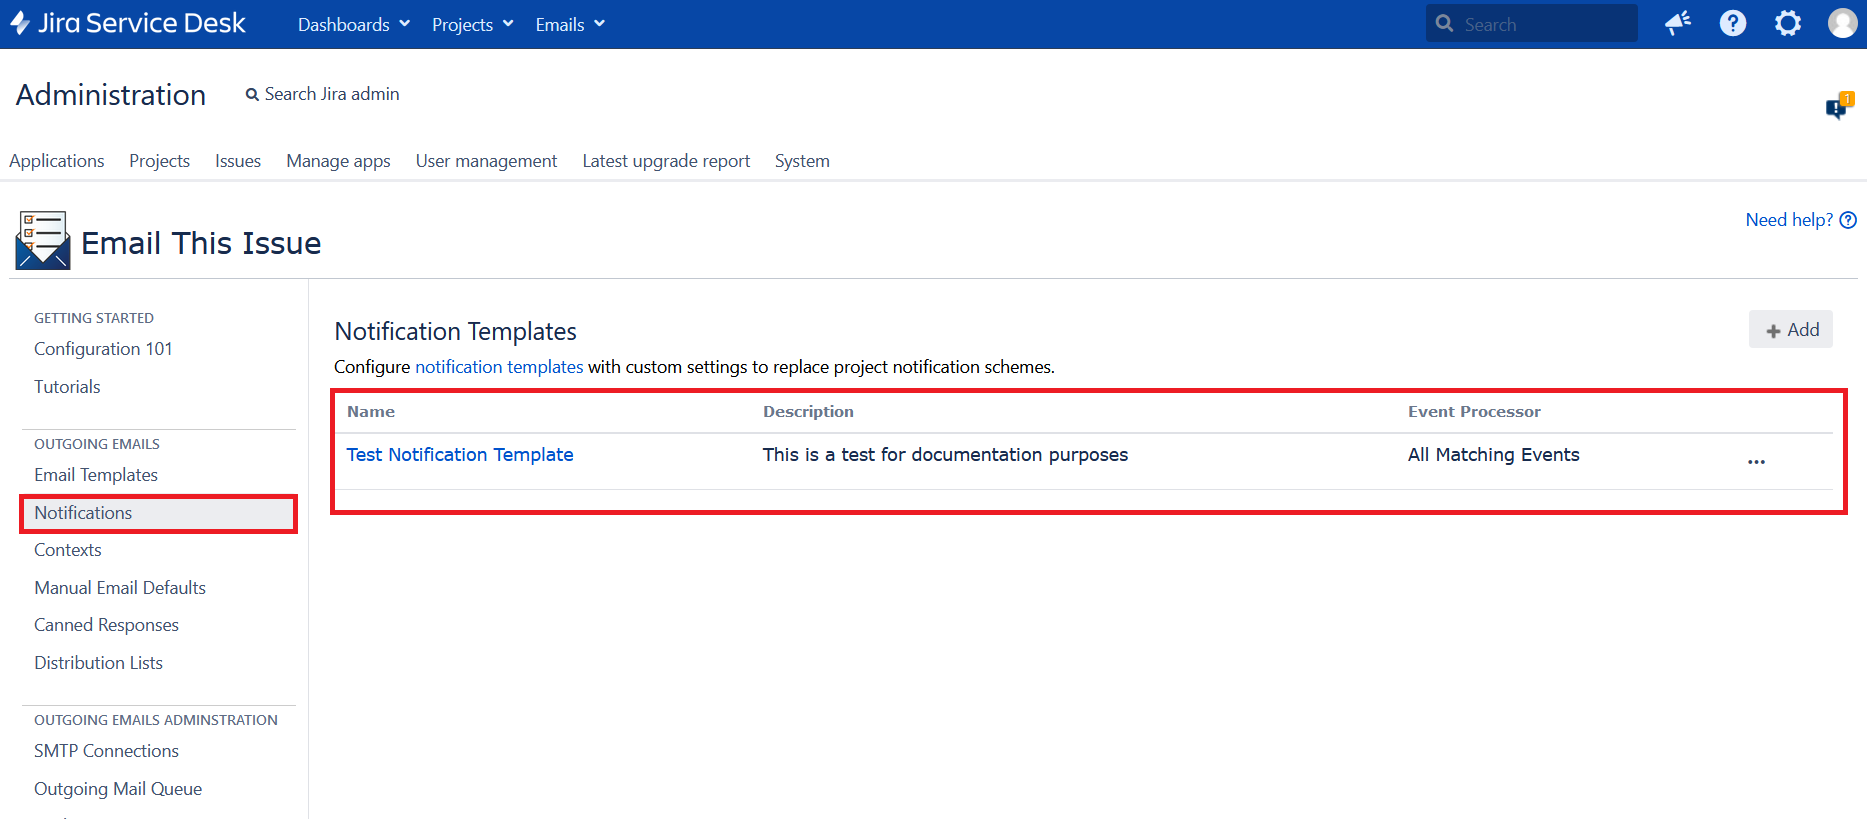
Notification Templates in General
In order to send out event notifications, you have to create Notification Templates. This is done by navigating to Notifications on the configuration screen.
Notification templates are listed here with their name, description, and the Event Processor setting (see "Send Different Emails to Different Recipients").
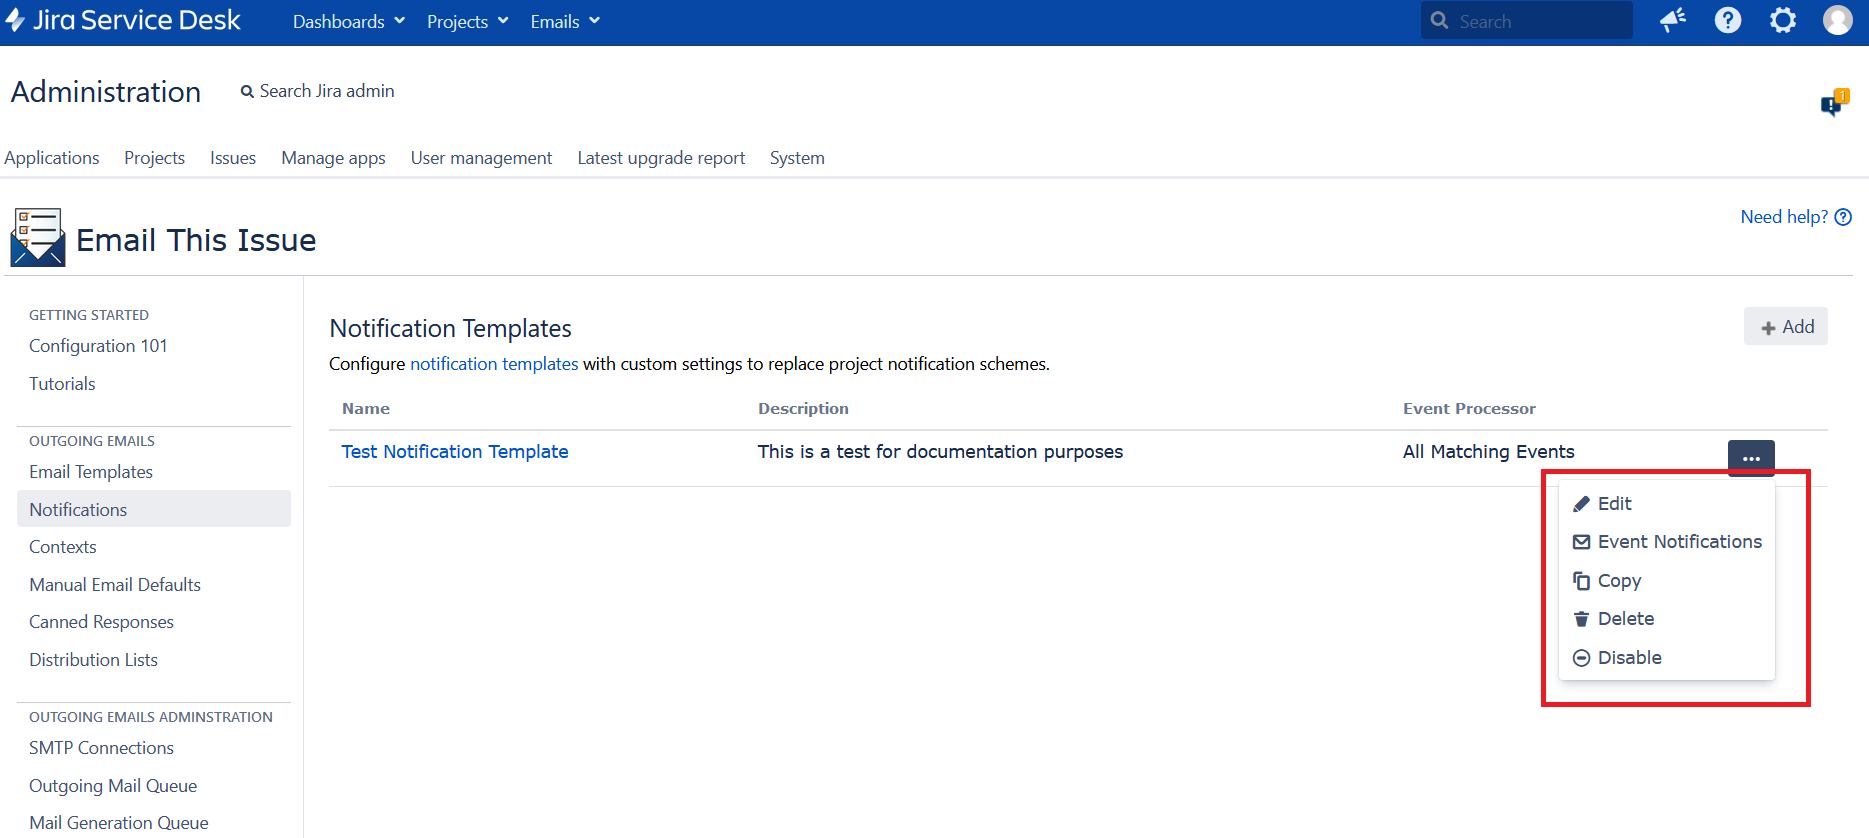
Operations are available by clicking on the three dots at the end of each row:
| Operation | Description |
|---|---|
| Edit | Edit the notification template. |
| Event Notifications | Show event notifications and customer notifications within the Notification Template. |
| Copy | Copy the notification template with all events and their configurations. |
| Delete | Remove the notification template with all its events. Cannot be reversed, if unsure, please use the Disable button. |
| Disable | Temporarily disable the Notification Template, preventing any event notifications within this group to be sent out. |
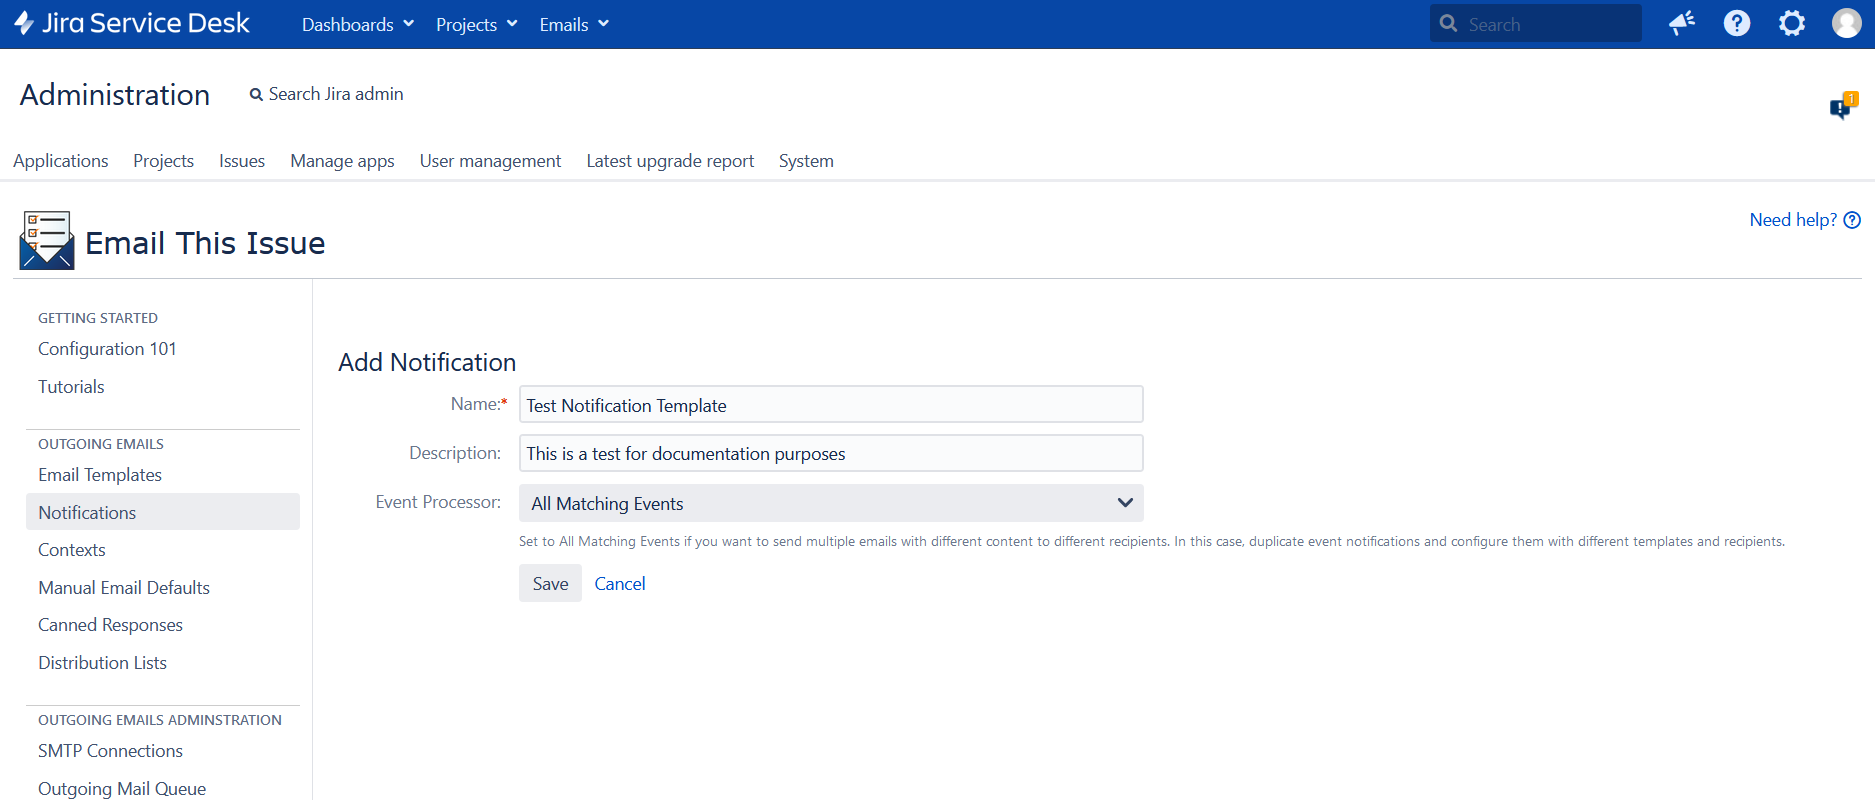
Adding a Notification Template
In order to add a new notification template, click on Add and enter the details such as below:
| Field | Value |
|---|---|
| Name | Name of the Notification Template. |
| Description | A description of the Notification Template (Optional). |
| Event Processor | Notification templates have two operation modes: processing the first matching event notification or all matching ones. |
Sending Customized Notifications to Different Recipients
As above mentioned, Notification templates have two operation modes: processing the first matching event notification or all matching ones.
| Event Processor | Description |
|---|---|
| First Matching Event | For an event fired in Jira, find the first (best) matching event notification by
If an event notification matches the issue event details, an email is sent to the recipients using the email template. |
| All Matching Events | In this case, the Notification Template processes all event notifications and customer notifications that matches by
Emails for all matching event notifications will be sent to the recipients configured within. |
In case you want to send different emails to different recipients for the same issue event, you may try to configure it based on the following example.
- Configure your Notification with Event Processor = All Matching Events
- Add all event notifications (see below) upon which you want to send emails
- Add the same event type for all the emails you want to send.
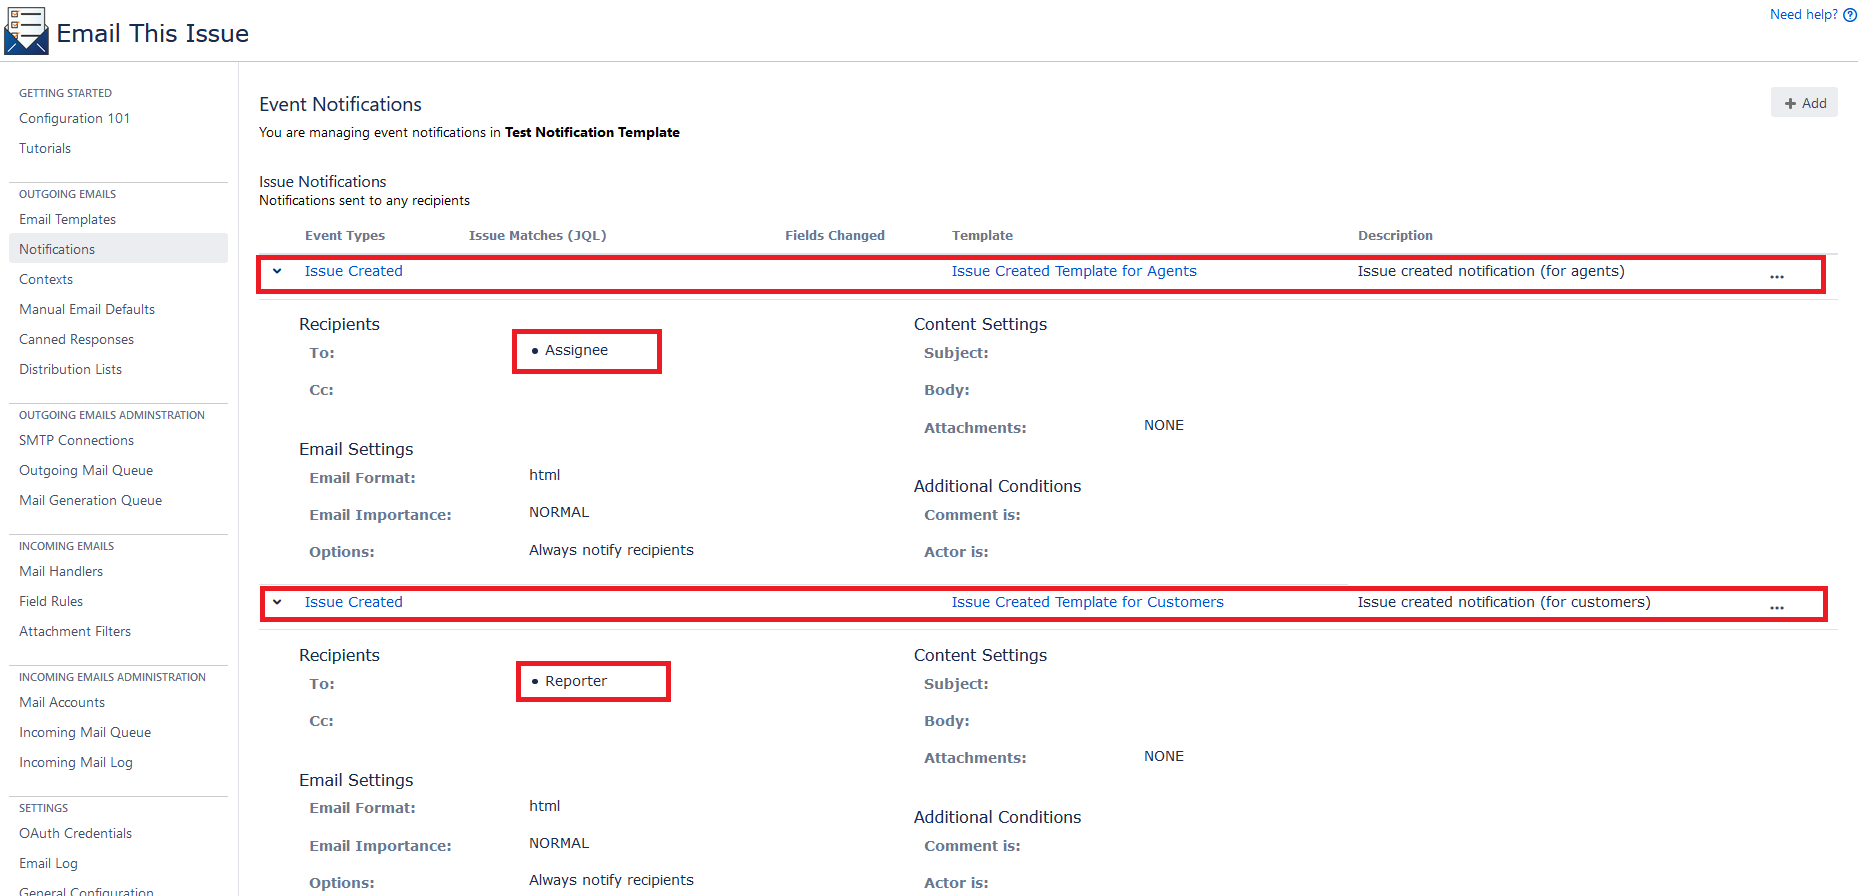
In this example, we would like to send two notifications upon Issue creation:
- One event notification for the Issue Created event, where the recipient is the Assignee and the "Issue Created Template for Agents" email template is used
- One event notification for the Issue Created event, where the recipient is the Reporter and the "Issue Created Template for Customers" email template is used
If the Event Processor was set to "First matching event", only the first one would have been sent, in this case, the one for agents would be sent out as this is the first one in line. Because however, we've set the Event Processor to "All matching events", both notification emails will be sent out.
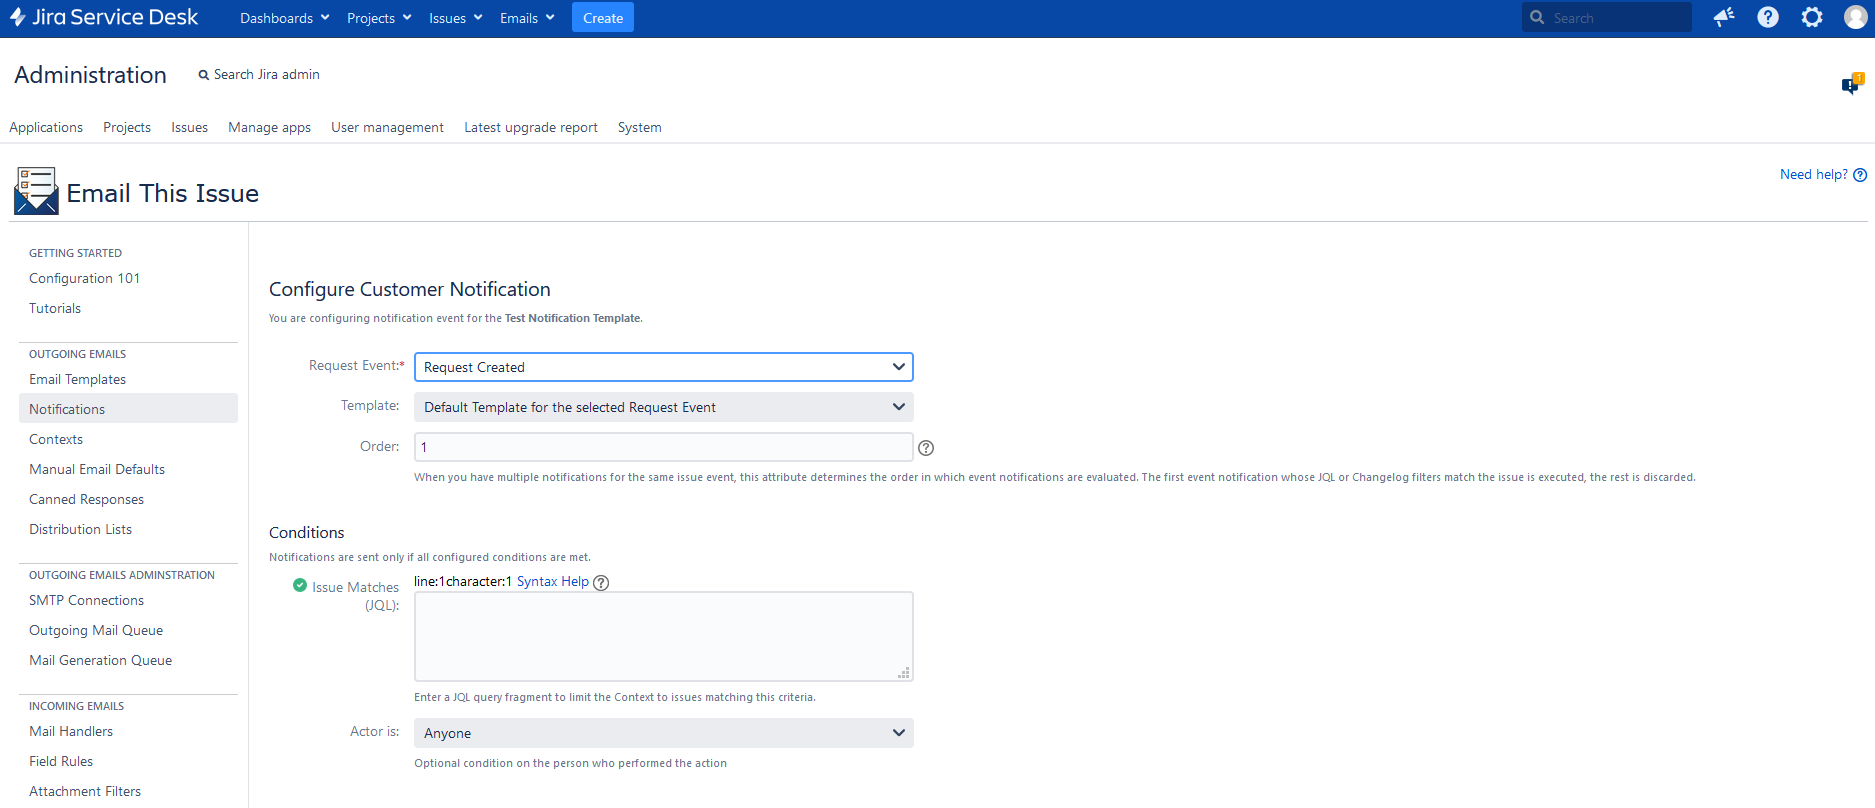
Adding an Event Notification to a Notification Template
Event Notifications map issue events to email recipients and email templates, and they specify additional email content: Subject and Body.
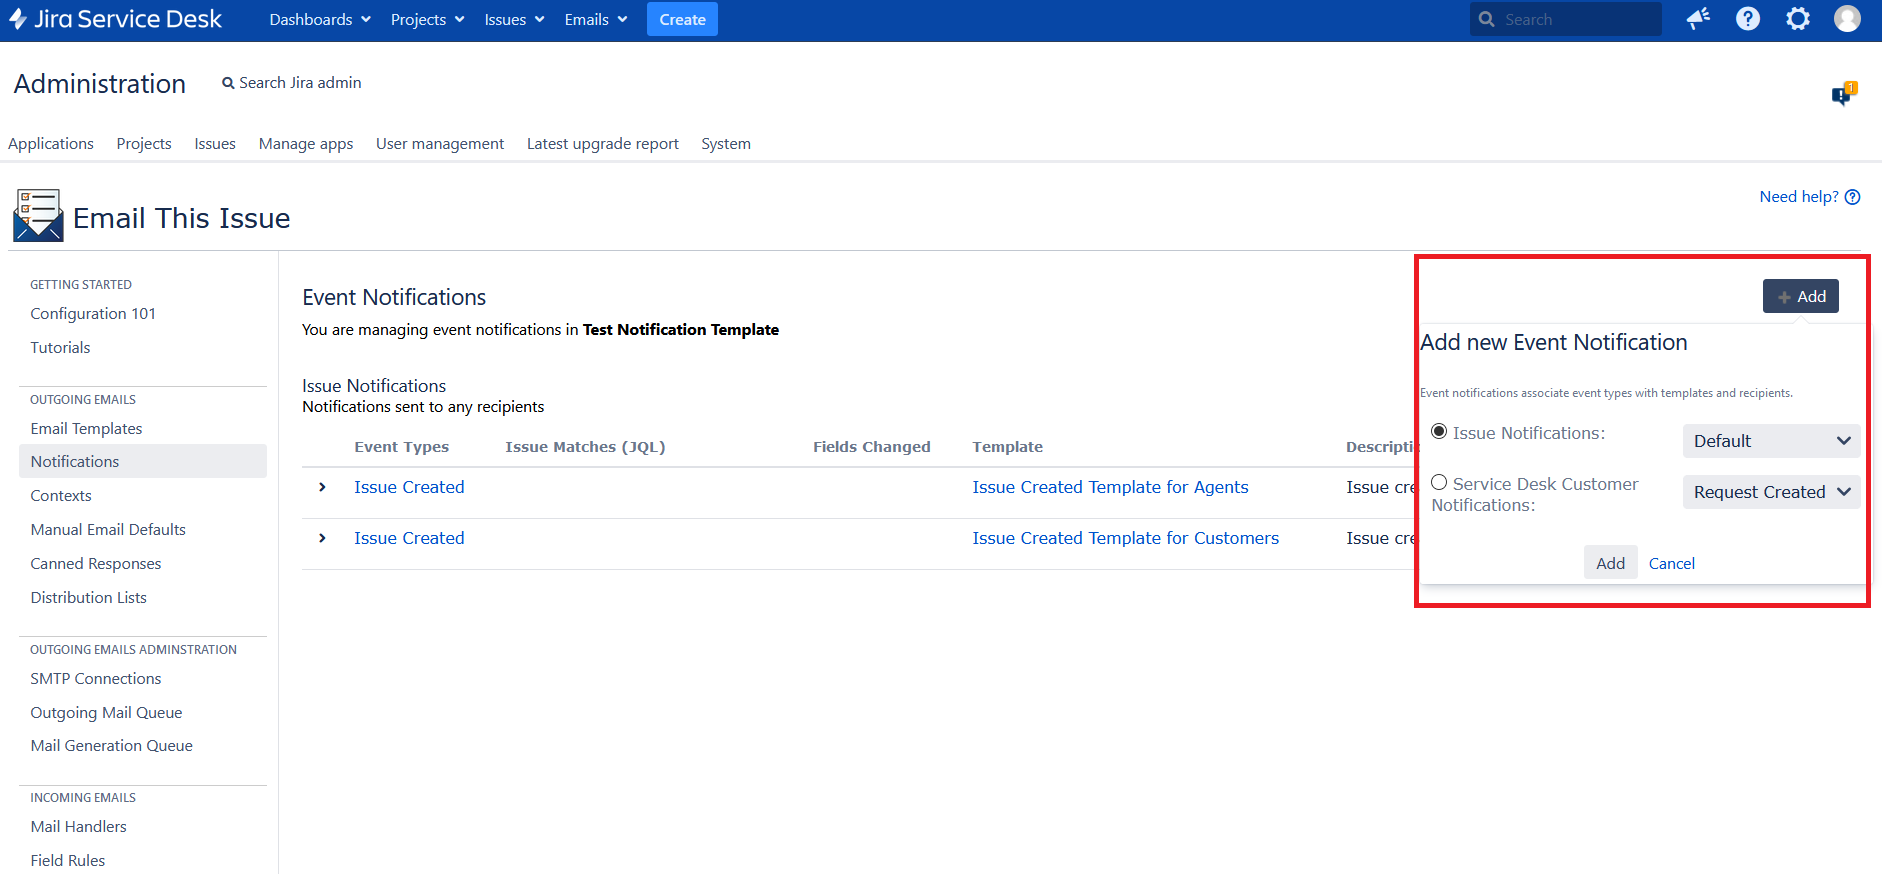
You can create an event notification by clicking on the Add button and selecting one of the two notification types.
There are two types of event notifications:
- Issue Notifications that can be sent to any recipient without any restrictions.
- Service Management Customer Notifications that can be sent to customers and external email addesses only (not to licensed users of any kind).
Issue Notifications
Issue Notifications can be sent to any recipients and are not based on Service Management Customer notifications at all.
After adding your event, or events if you want to have the same notification for multiple events, you can configure it with an email template, add recipients to it, specify additional email content, and email settings.
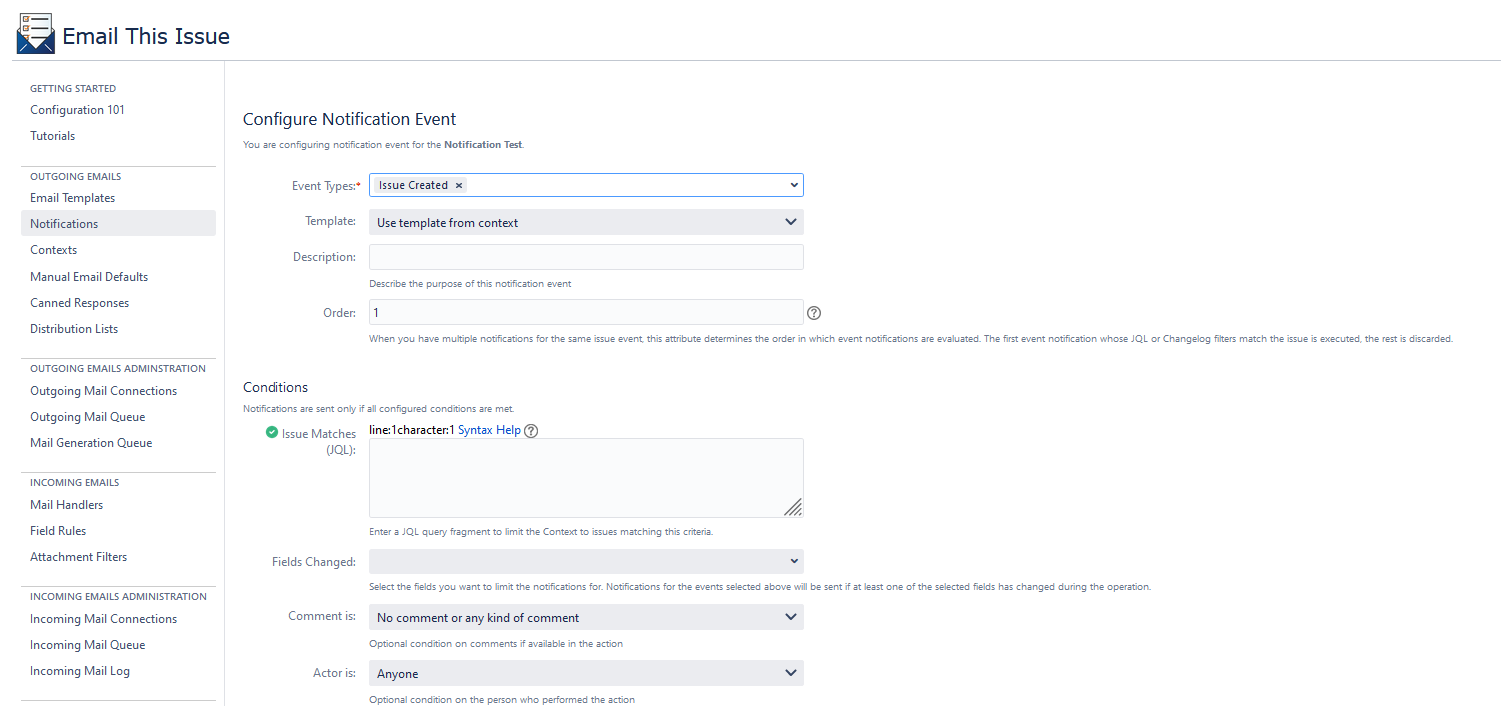
There are six parts to configuring in an issue notification:
- specifying the event(s) that trigger the notification, choosing a template to send in the email and optionally giving it a description and an order
- conditions that apply to the notification. If any conditions are set here, the notification will only be sent if all of them are met
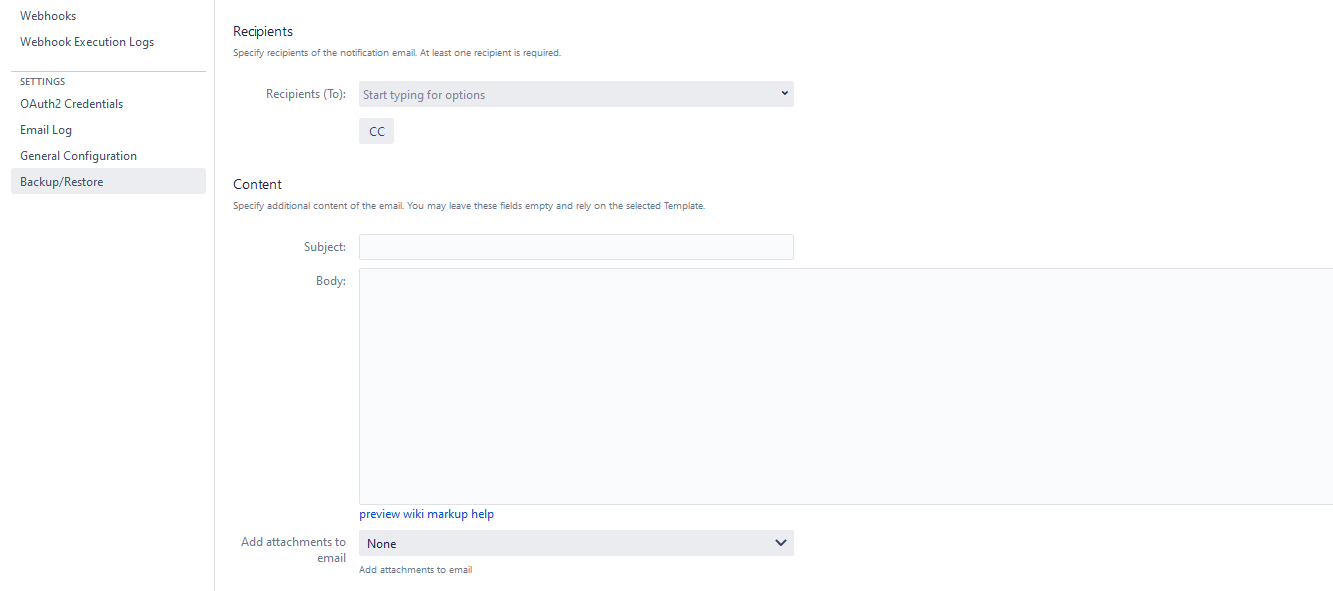
- TO and CC recipients, that must be entered here (BCC is available only if enabled in the General Configuration)
- content which may be added to the template (such as email subject or body)
- selecting which attachments to add to the outgoing email
- email settings to specify additional options applicable to your outgoing email.
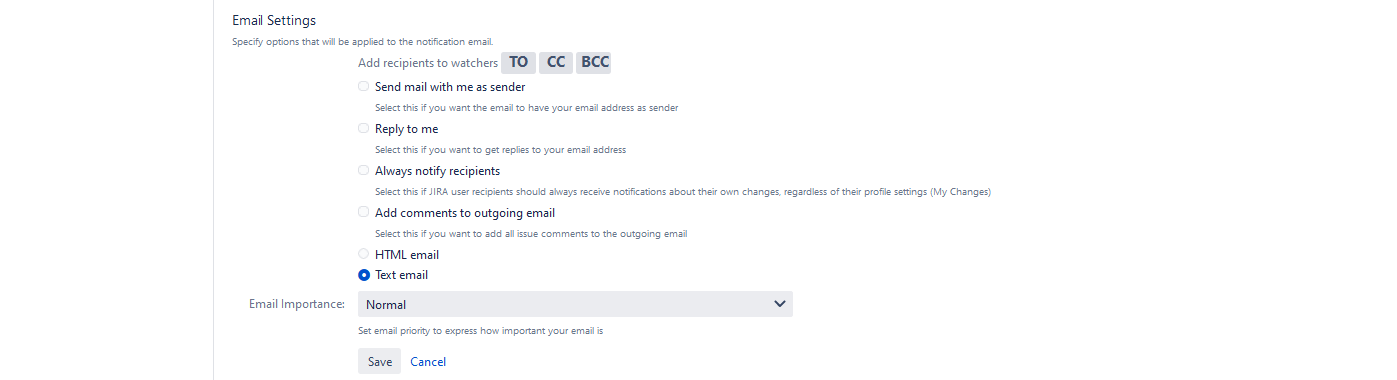
My changes: do not notify me
By default, Email this issue respects the profile setting "My changes: do not notify me". This means, that the current user performing an action in Jira may not get event notifications on their own actions. To override it, you can enable the option "Always notify recipients" in the Email This Issue event notification.
Service Management Customer Notifications
Customer Notifications are based on Service Management Request Events in contrast to regular Issue events. Service Management Customer Notifications can only be sent to customers and external email addresses (not to users of any kind).
Service Management Request Events that are currently supported in our app:
| SD Request Event | Description |
|---|---|
| Request Created | Event fired when a Service Management request is created |
| Request Updated | Event fired when a Service Management request is modified |
| Request Resolved | Event fired when a Service Management request is resolved |
| Request Reopened | Event fired when a Service Management request is reopened |
| Public Comment Added | Event fired when a Service Management request receives a public comment |
| Customer Visible Status Changed | Event fired when the status changes in a request noticeably in the Customer Portal |
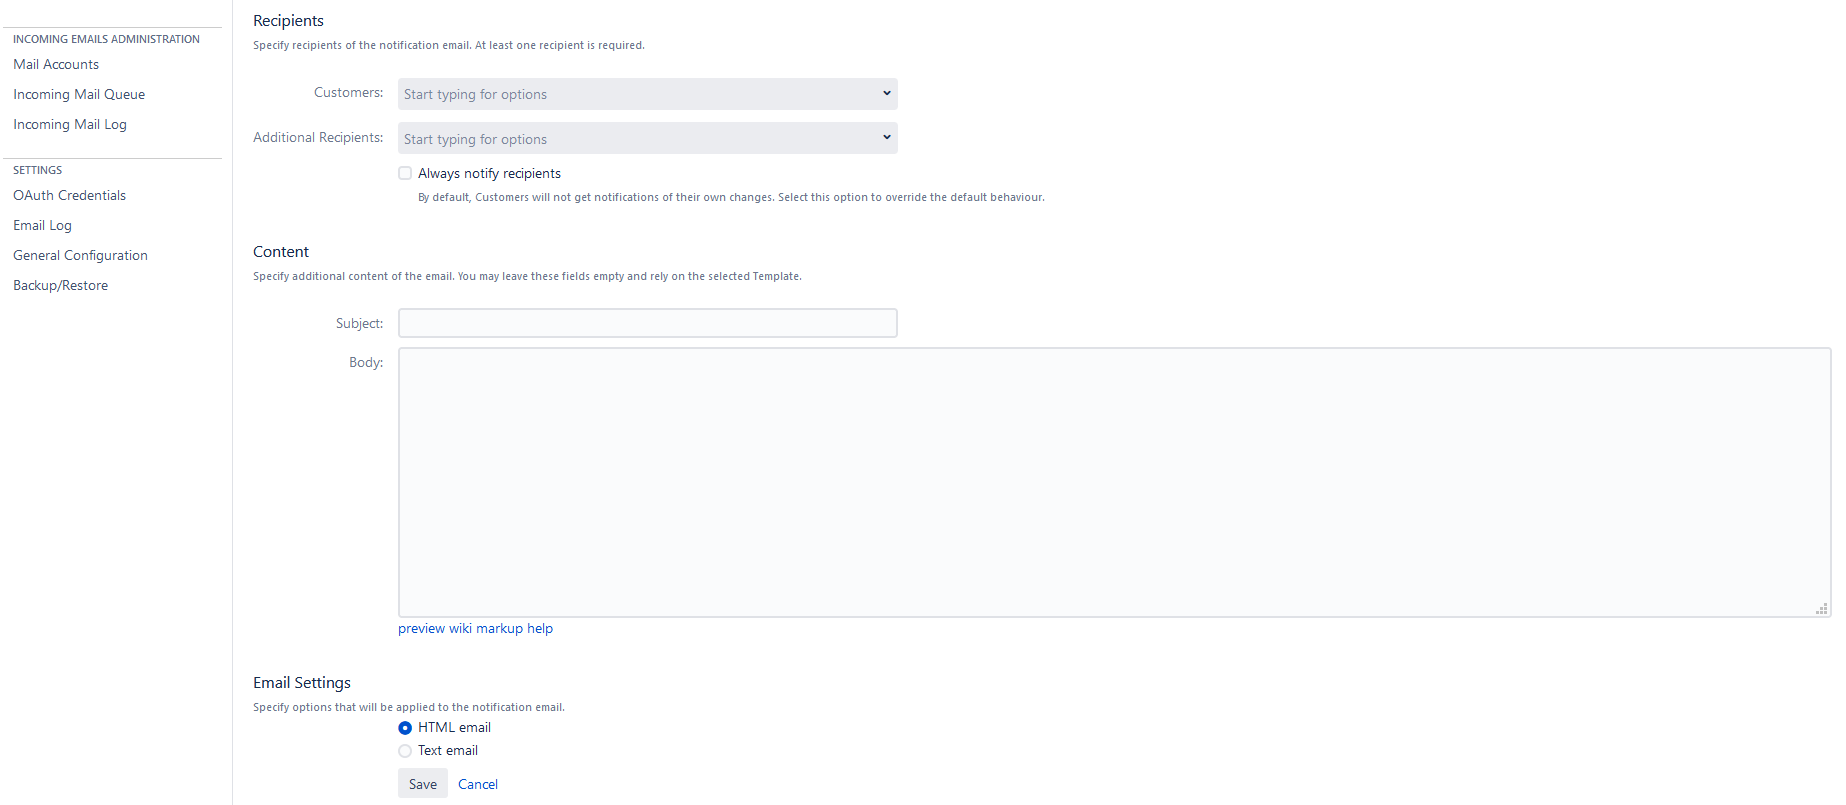
There are six parts to configure in a Service Management Customer notification:
- the scope, specifying events that trigger the notification, choosing a template to send in the email and optionally giving it an order
- conditions that apply to the notification. If any conditions are set here, the notification will only be sent if all of them are met
- TO and CC recipients, that must be entered here (BCC is available only if enabled in the General Configuration)
- content which may be added to the template (such as email subject or body)
- email settings to specify additional options applicable to your outgoing email
My changes: do not notify me
By default, Email this issue respects the profile setting "My changes: do not notify me". This means, that the current user performing an action in Jira may not get event notifications on their own actions. To override it, you can enable the option "Always notify recipients" in the Email This Issue event notification.
All Matching Event
If you combine Issue Event Notifications with Customer Notifications, please set the Notification to "All Matching Event" to make sure both users and customers receive their notifications.
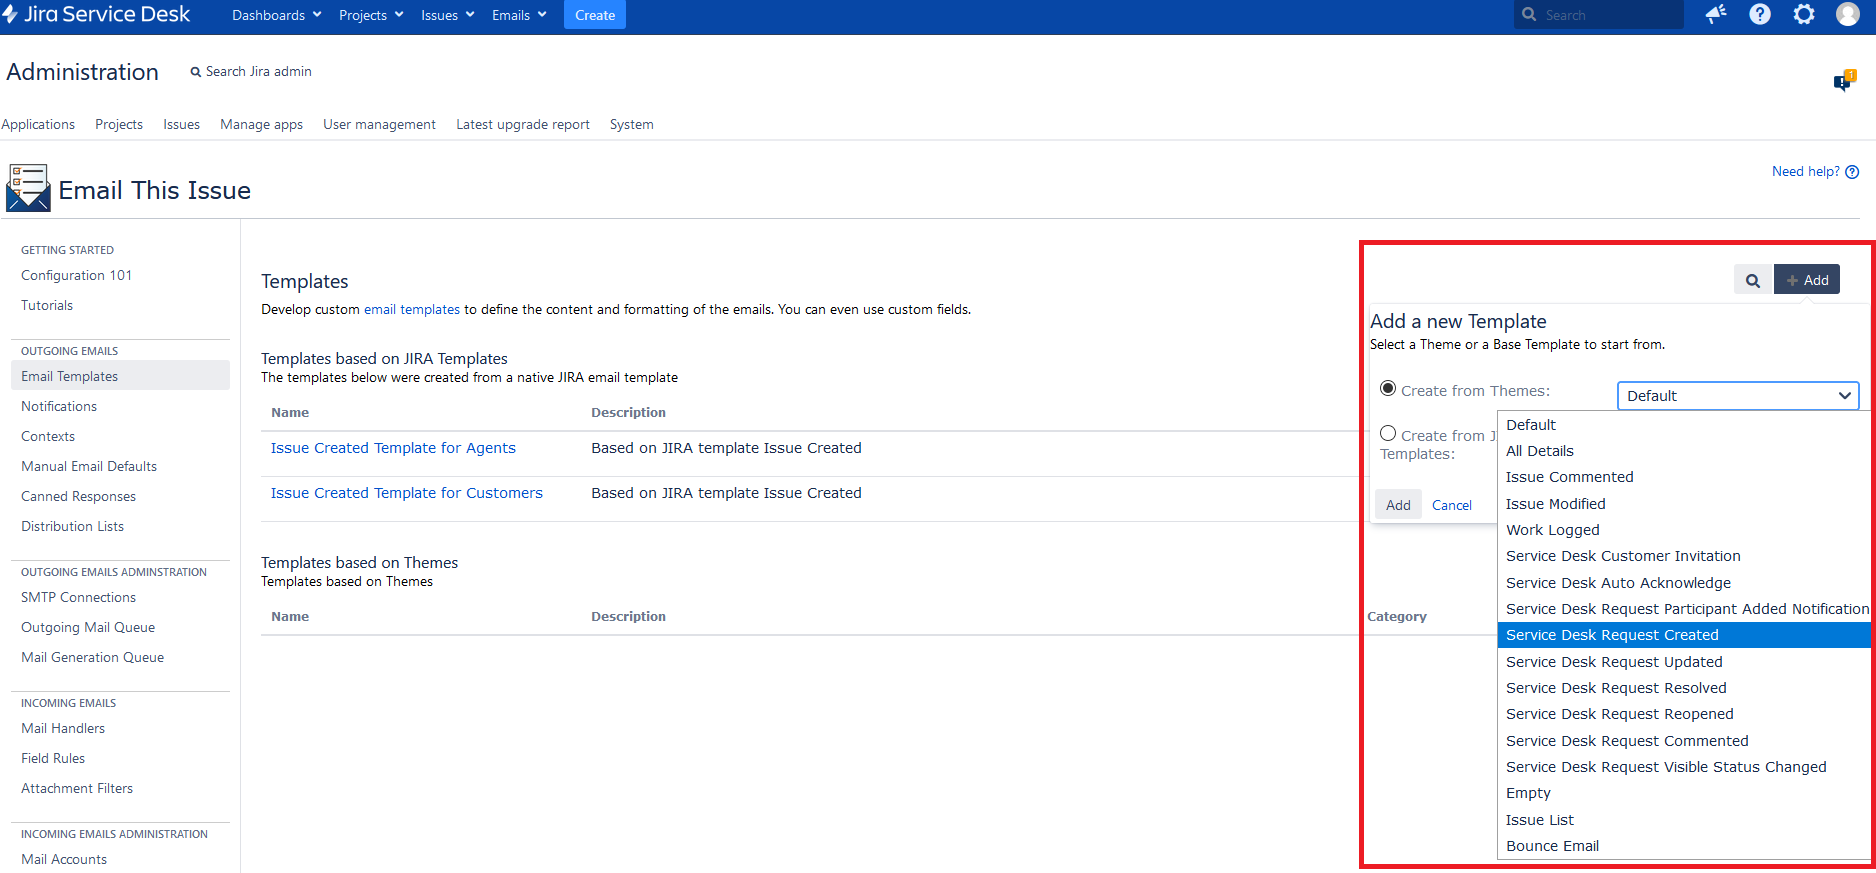
Customizing Service Management Customer Notification Email Templates
Service Management Customer Notifications are based on Service Management specific events like Public Comment Added. For each Service Management Event types there is an embedded email template theme.
When configuring a Service Management Customer Notification, you will be able to select from the templates based on the related template Theme only.
E.g. for the event Service Management Request Created event, you will see templates created from the Service Management Request Created theme.
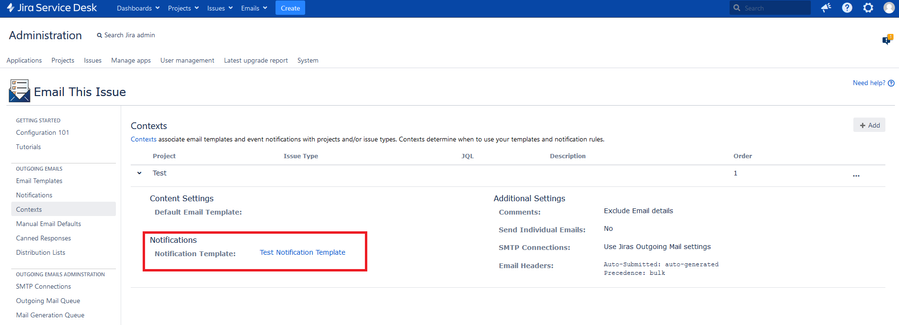
Mapping Notification Templates to Scopes in the Contexts
Once your notification template is set up with event notifications, email templates, and recipients, you must map it with a scope.
If you miss this one step, your notifications will not be sent. Navigate to Contexts and select your notification template in the respective drop-down menu.