...
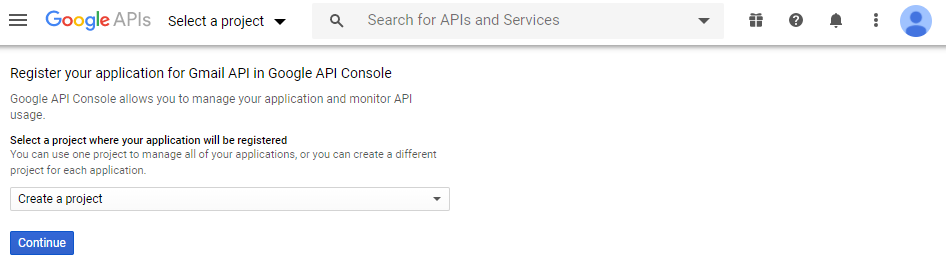
Step 3 - Select or Create a new Project
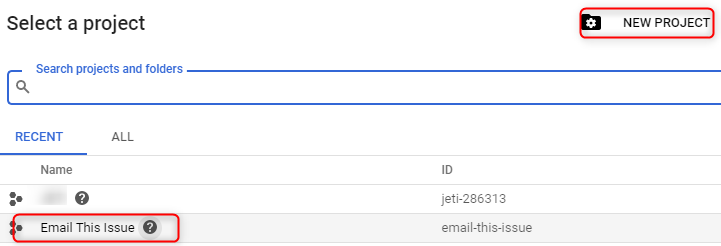
At this point you need to choose: if you have already set up Email This Issue as a project, select it in the dropdown. Otherwise, start creating new project by clicking Continue.
If you choose to create a project, because Email This Issue does not exist yet,
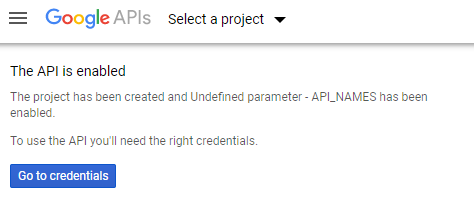
Step 4 - Confirm API is enabled
If you do it the first time, you’ll see this page. Click Go to Credentials.
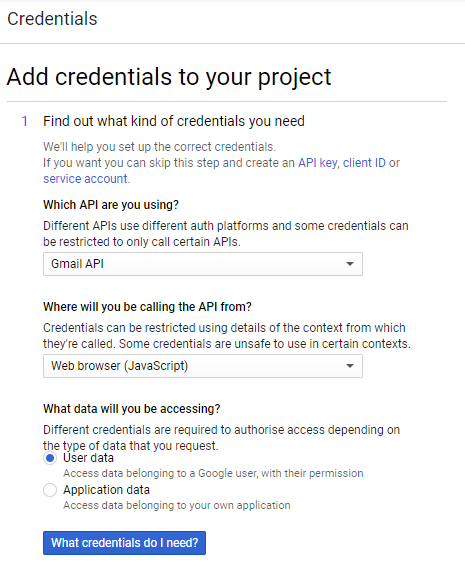
Step 5 - Set up Credentials
When this screen appears, make sure you configure it as in the below screenshot. If complete, click “What credentials do I need?”
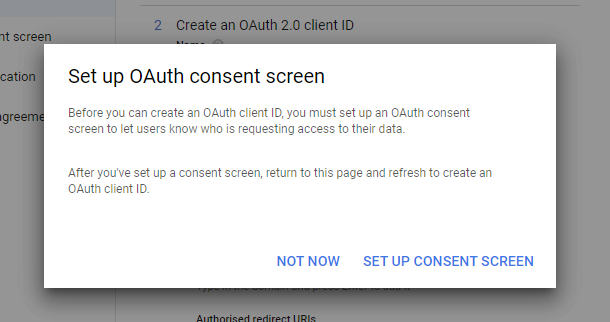
Step 5 - Set up Consent
When this screen appears, click “Set up Consent Screen”.
Once you move forward, the below screen is shown.
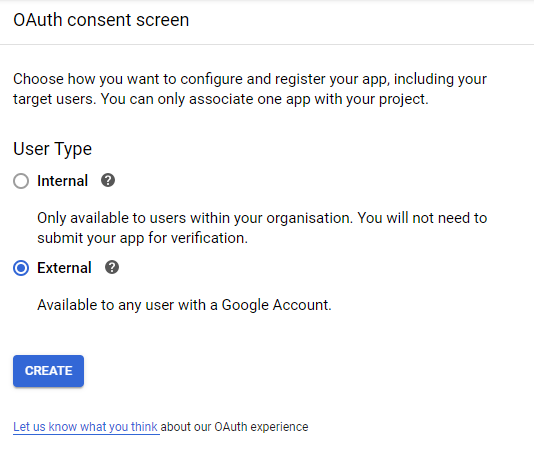
At this point, you can select Internal if you are connecting to an account in your organization (you use GSuite), or to a regular Gmail account. In the latter case, select External.
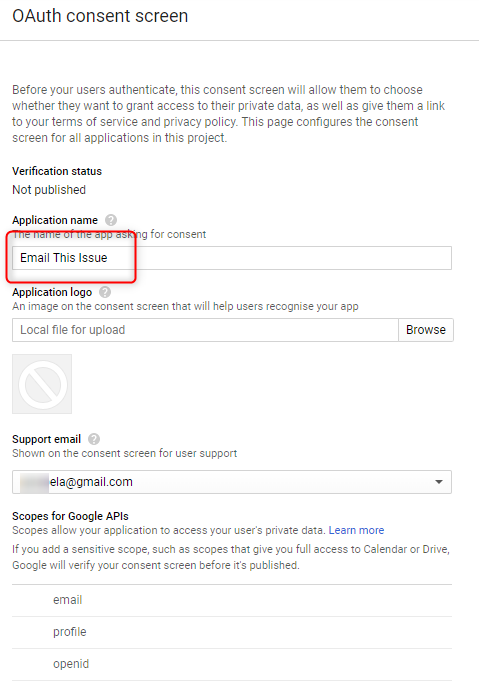
Step 6 - Configure the Consent for Email This Issue
A Consent is a set of information that is presented during the authorization process. It helps identify the application that requires the authorization.
In the Consent page, enter the application name: Email This Issue and click Save
Step 7 - Credentials
Go to Credentials in the left side menu. Click Create Credentials and select OAuth Client ID.

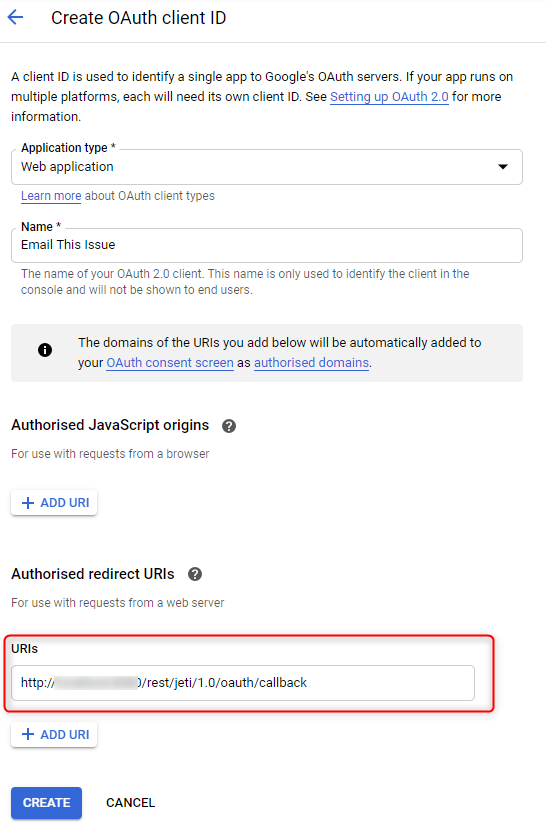
Step 8 - Configure your Credentials
Configure the credentials as shown. Application type is Web Application, and the name of the app is Email This Issue.
| Info |
|---|
Do not forget to add the Redirect URI. This is going to be specific to your Jira URL. The Redirect URI always follows this format: <JIRA BASE URL>/rest/jeti/1.0/oauth/callback |
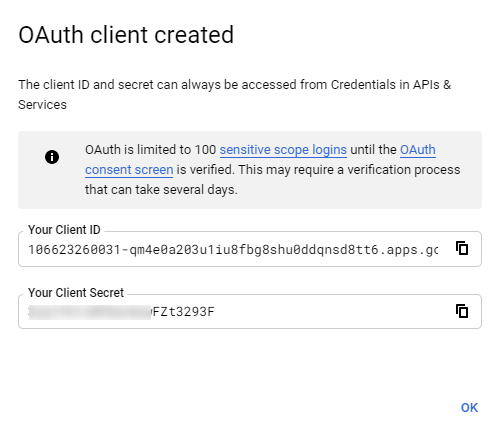
Step 9 - Receive your client ID and secret
If you click Create in the above screen, the newly generated secure client credentials are presented as below.
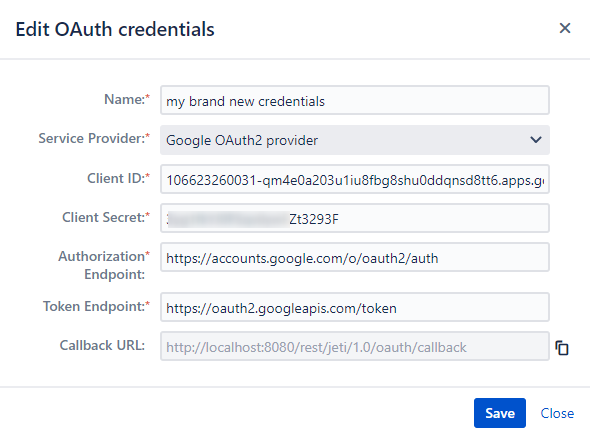
Step 10 - Save Client Credentials in Email This Issue
Use this screen to copy the Client ID and Client Secret values into an OAuth2 Client Credentials in Email This Issue.
On this page | |
|---|---|
|