...
| Excerpt |
|---|
This tutorial explains the steps you understand how you can enhance Jira Service Desk Management with Email This Issue to process incoming emails or to send customer notifications. |
Use Case
The below tutorial covers the following use case:
- external customer reports a ticket via email, a new issue is created from email and a customer account is created automatically
- service desk management agent requests more information form the customer by commenting the issue, customer is notified
- customer replies to the email, the issue is commented, old content from the email is stripped out
- service desk management agent resolves and closes the issue, customer is notified.
Step-by-step guide
There two major aspects you must configure to implement the above use case:
- Mail Handler
- Event Notifications
Prepare Email Templates for Customer Notifications
Email templates are needed only if you want to send emails to your customers.
- Go to Email Templates
- Click Add to add one template from each of these Themes:
- Service Desk Management Customer Invitation: If customers may be created automatically with Public Signup Enabled in Service DeskService Management
- Service Desk Management Request Participant Added Notification: if you want to notify participants when they are added
- Service Desk Management Auto Acknowledge: if you want to automatically acknowledge incoming emails
- Service Desk Management Request Created / Updated / Resolved / Public Comment Added: if you want to setup event notifications for Customers
- Use the default template content, you can customize the templates any time later.
Configure Mail Handler to Process Emails
- Go to JIRA Administration / Incoming Mail
- Add an IMAP or POP connection to an email account, let's say support@mycompany.com.
- Add a Mail Handler with the below parameters:
- Name: give a descriptive name, like "MyCompany Support Handler"
- Server: select the email account you configured above
- Handler: select Email This Issue Mail Handler
- Project: select the Service Desk Management project in which you want to track your ticket, let's say the project is: Helpdesk
- Issue Type Select the type you want to use to represent a ticket, e.g. Request
- Specify a default reporter: a user who has Create Issue and Add Comment permissions in the project
- Leave other settings with the default value (do not enable Create Users option)
- Go to Administration / Issues, add a text multi-user picker custom field, call it External Participant. Make sure the field js is accessible in the project and issue type you configured above.
- Go to JETI Administration / Mail Handlers (JIRA_BASE_URL/secure/admin/jeti/jetiAutoReply.jspa)
- Click Add to add a Mail Handler Context
- Set the attributes of the Mail Handler Context:
- Project: select the Service Desk Management project you configured your mail handler.
- Issue Type: select the default issue type you configured above (Request).
- Select the Email Processing Strategy: Service DeskManagement : Create or Comment Requests
- Select the Customer Request Type to use. Request Types are dependent on the selected Issue Type.
- In "When Customers are Created", select the template based on theme "Service Desk Management Customer Invitation" or leave it empty
- In "When Participants are Added", select the template based on theme "Service Desk Management Request Participant Added Notification" or leave it empty
- In "ServiceDesk Service Management Comment Visibility", select "Default Behaviour"
- In Acknowledge New Issues and Acknowledge New Comments, select the template based on theme "Service Desk Management Auto Acknowledge" or leave it empty. This will make sure that email senders will get an instant feedback from your JIRA system, that their emails have been processed. The email will contain the issue key as a reference number.
- In User Recipients, select "Save to multi user picker field" and select the above created field.
- In Sender Field, select the "External Participants" field
- In Recipient Field and Copy Recipient Field, select the "External Participants" field
- Email Address Exclusion: enter the email address this Mail Handler is listening on (you configured it in step 2 above).
In Split Regex, enter
No Format /From: |___.|On .wrote:|----Orig.|On .(JIRA)./
- Click Save to persist your Mail Handler Context.
...
See more details on Mail Handlers and Service Management Integration
Configure Event Notifications
- Go to JETI Administration / Notifications (JIRA_BASE_URL/secure/admin/jeti/jetiNotifications.jspa)
- Click Add to create a new Notification Template, call it anything, e.g. ServiceDesk ServiceManagement Notifications, make sure you select "All Matching Events" in the Event Processor field
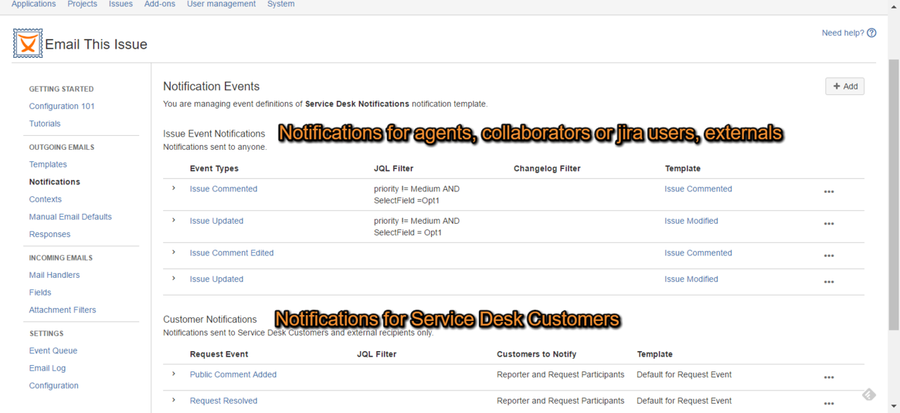
- Now you are in the Notification Events page.
- Click Add to add an Customer Notification events to notify Customers on. For each customer notification:
- specify email template you created above based on the appropriate themes
- specify recipients and additional email content
- Click Add to add an Isssue Event Notification to notify Agents or Collaborators on. For each issue event notification:
- Specify events as described in this tutorial. Setting up Customized Notifications
- Click Save to persist your settings
- Repeat the above steps from Step 8 to add all your events.
- Once completed, your Notifications will look like this:
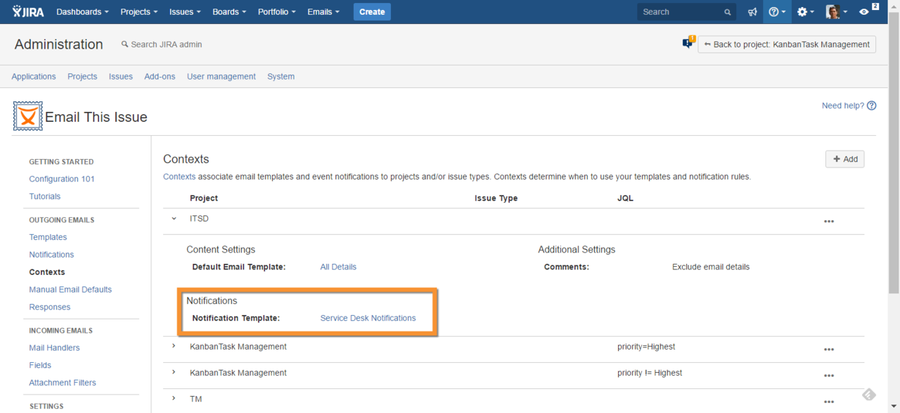
- Go to JETI Administration / Contexts (JIRA_BASE_URL/secure/admin/jeti/jetiProjects.jspa)
- Click Add to add a new context with the following attributes:
- Project: select the project you configured your Context for (Helpdesk). You can leave Project empty to use this context for all projects.
- Issue Type: select the type you configured above (Request). You can leave issue type empty, to use this context for all issue types.
- Template: select the template you created above (Helpdesk template)
- Notification template: select the notification you created above (Helpdesk Notifications).
- External Watchers Field: select the field you created for your Mail Handler, called External Participants.
- Sender Name Pattern: enter a name that appears in the emails as the sender, you can leave it empty.
- From Email Address: enter the email address you created for your mail handler (support@mycompany.com)
- Here your Context should look like:
...