| Redirect | ||||||
|---|---|---|---|---|---|---|
|
| Note | ||
|---|---|---|
| ||
Thank you for visiting our old product documentation site. Note that weare in the process of migrating our product documentation and soon we will notno longer store or update our documentation here.Please navigate to our new documentation site and update your bookmarks accordingly. If you're looking for the former content of this page, click here. |
| Table of Contents |
|---|
Advanced Email Configurations provide a set of optional features that may be useful when you have complex scenarios to fulfill. The list of Advanced Email Configurations may be accessed from the Email This Issue configuration screen.
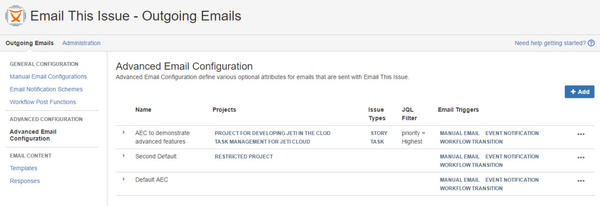
It is perfectly valid to add multiple Advanced Email Configurations, but there are three aspects to consider in each of them:
- Scope
- Email Settings
- Outgoing Mail Connection
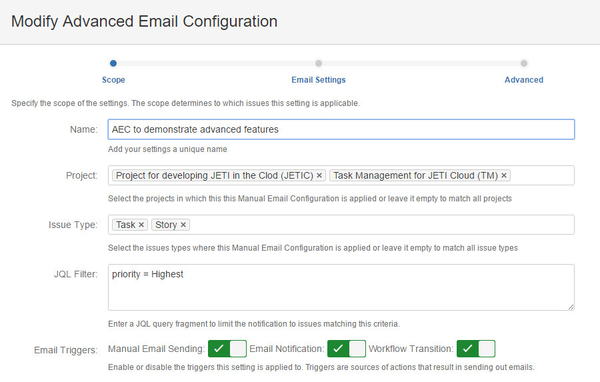
Scope
The scope determines to which issues this setting is applicable. If there are multiple Manual Email Configurations in the system, Email This Issue evaluates all of them and determines the one with the best matching scope for the issue that the users want to send in emails.
The scope may be composed of:
- 0 or more projects
- 0 or more issue types
- An Optional JQL query
- Email trigger
The below example matches the Highest priority issues of type Email in the TM project.
To enter a JQL which involves a user name (such as defining the assignee of an issue), follow the below steps:
- Under the JQL field, click Edit
- Enter the JQL as usual
- When it comes to entering a username, search for it, then click on Insert user
- Click Save to use the JQL or click Cancel to delete it
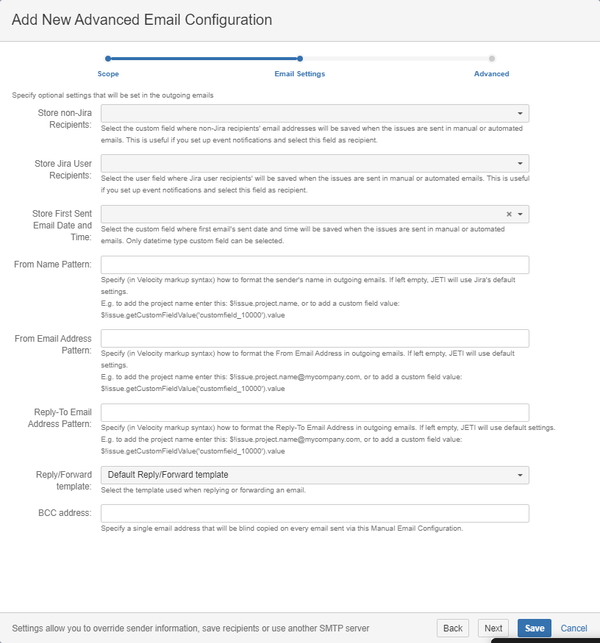
Email Settings
In the Email Settings tab, several advanced attributes are available.
...
Select a Text custom field here to store external email addresses of each outgoing email in a comma-separated manner.
You can use this field in email notification schemes to send automated emails. This way the field selected here may be considered as a field for external watchers.
...
Select a Date Time Picker field here to store the first sent email's sent time.
First sent email's sent time is determined by the email audit log. This means that the value will always be the first sent email's sent time, not the first emails sent after this field has been set.
...
The pattern here allows you to dynamically generate From Name attribute in the outgoing emails.
An example: $!issue.project.name Hotline will render the from name based on the issue's project name and will append the word "Hotline".
| Info |
|---|
The From Name Pattern function does not work with the Built-in Mail server. This option may only be used with custom servers where the server allows for such configuration. |
...
A patterns that should evaluate to a valid email address and will be used as from address in the email.
You can use this field to dynamically generate the From Email Address of the outgoing emails.
| Info |
|---|
The From Email Address Pattern function does not work with the Built-in Mail server. In the built-in Mail server the outgoing mail address is always do-not-reply@<instance>.jeti.cloud. This option may only be used with custom servers where the server allows for such configuration. |
...
A patterns that should evaluate to a valid email address and will be used as reply-to address in the email.
You can use this field to dynamically generate the From Email Address of the outgoing emails.
...
Advanced
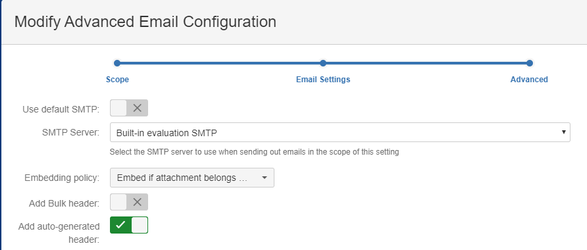
Use default Outgoing Mail Connection: Email This Issue may be configured with multiple Outgoing Mail Connections. You can select here the one to use to send emails or enable "Use default Outgoing Mail Connection" to always use the Outgoing Mail server marked as default.
Embedding policy: Here you can configure how to send out attachments. It has 2 options:
- Embed if attachment belongs to this Jira: selecting this option will cause that all attachments (images and non-images) will be sent as part of the email.
Do not embed images at all: If you select this option, then links in the email will not be loaded and target attachments will not be sent.
You can override this setting as described in HTML Body Template on the Customizable Email Templates page
Add Bulk header: It can be configured to add Precedence: Bulk header to outgoing emails or not. This is a good practice to add this header to the emails, so that auto responds (eg out-of-order) should not be sent in reply to these emails.
...
. |