This article explains how to enable Microsoft 365 OAuth2 in your Microsoft Azure tenant to authenticate Email This Issue. This allows you to send FROM and receive TO your Microsoft 365 address using this application.
This guide applies to create and configure client credentials for both incoming and outgoing connections requiring OAuth2 authentication, more specifically:
IMAP with OAuth2 authentication to read an Office365 mailbox
SMTP with OAuth2 authentication to send mails from Office365 address
Microsoft Graph API (uses OAuth2 by default) to read an Office365 mailbox
Microsoft Graph API (uses OAuth2 by default) to send emails from Office365 address
The only difference between these use cases is in their permission scopes they require to operate, i.e. all the steps detailed in the Application registration chapter are identical, except for the 4th one, where the appropriate scopes are added.
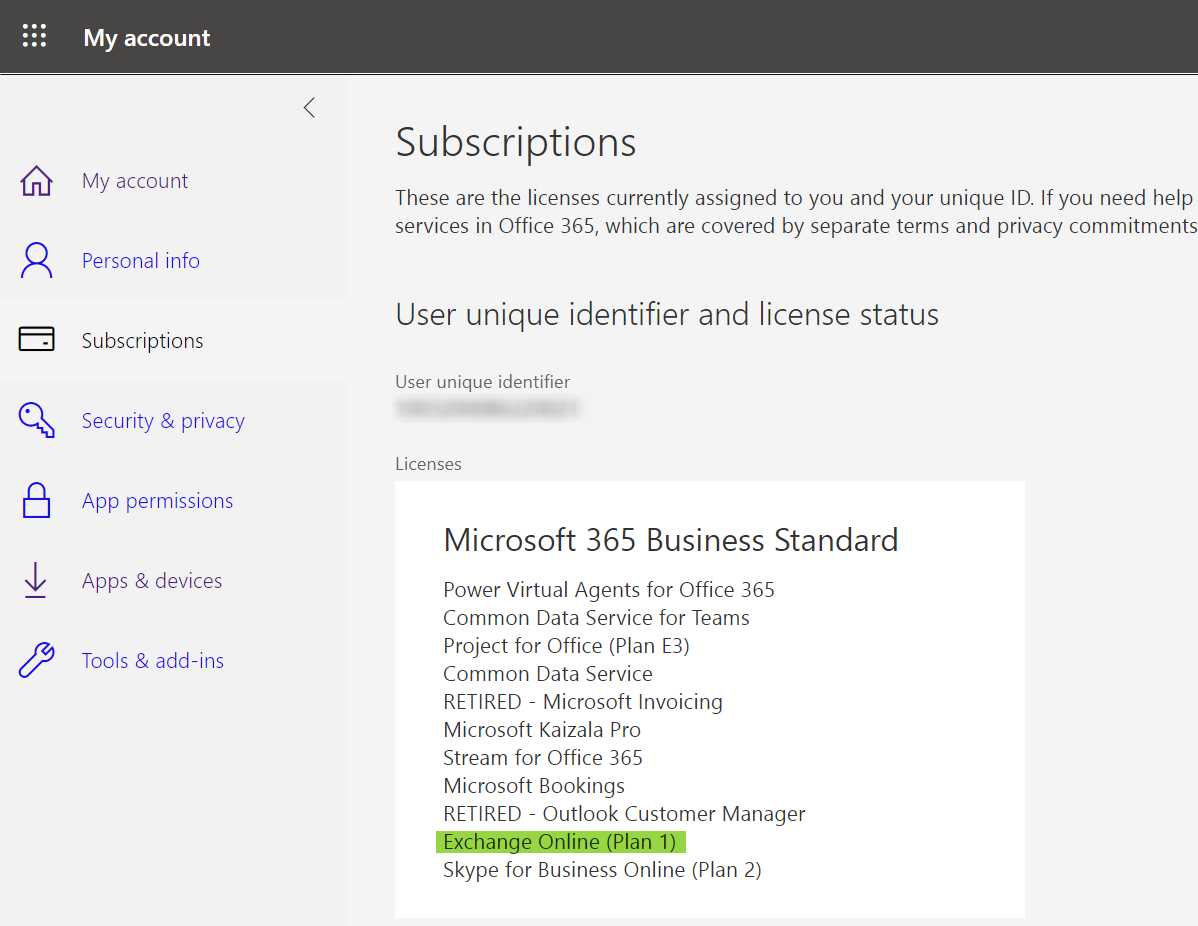
Before starting with the app registration, you need to have a Microsoft365 account and you should also check whether you have an active Exchange Online license (aka “subscription”) otherwise, you will get obscure error messages during the authorization process.
For example, if you have a Microsoft 365 Business Standard package, you should see something like below:
Steps to register an application are as below.
Step 1 - Find Azure Active Directory to Manage You Account
Visit the following link in your Microsoft Azure account (within your Azure Active Directory):
https://portal.azure.com/#blade/Microsoft_AAD_IAM/ActiveDirectoryMenuBlade/RegisteredApps
Step 2 - Initiating an app registration
Click on “+ New registration“

Step 3 - Account (tenant) type selection
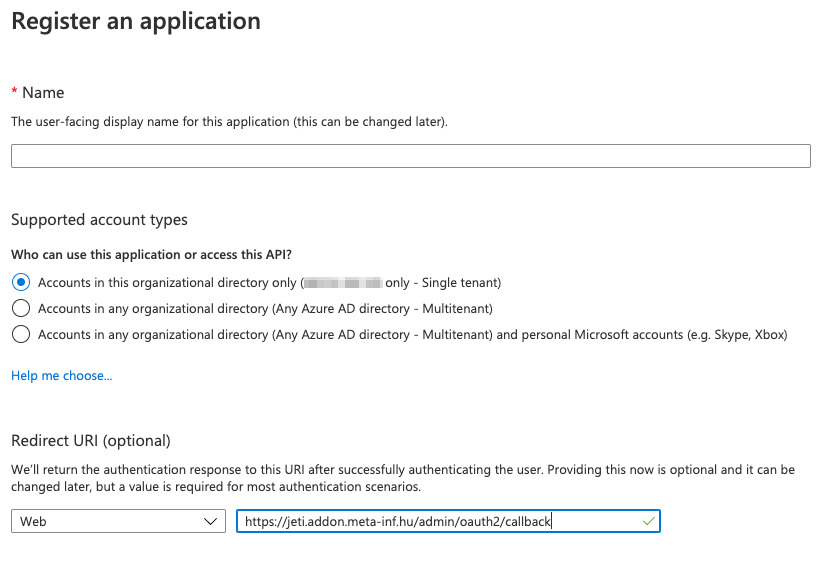
On the next screen, you can register your application
Attributes:
Name: Give it a name so that you can identify the app easily.
Account type: Select the account type whether it should be available for accounts outside your organization or not.
Single tenant: choose this if the app is accessible for your organizational directory
Multitenant: choose this if you want to allow any organizations to use this app
Redirect URI: In the Redirect URI section leave the Web as selected and copy+paste the Callback URL from the OAuth2 Client Credentials dialog as the URI value. As this URL is specific to your Jira instance, it is important to copy the URL from the Email This Issue app into this page as a URI of another Jira instance cannot be reused.
| Note |
|---|
At the time of writing the OAuth2 for SMTP/IMAP is not supported for personal Microsoft accounts. |
Step 4 - Define API permissions
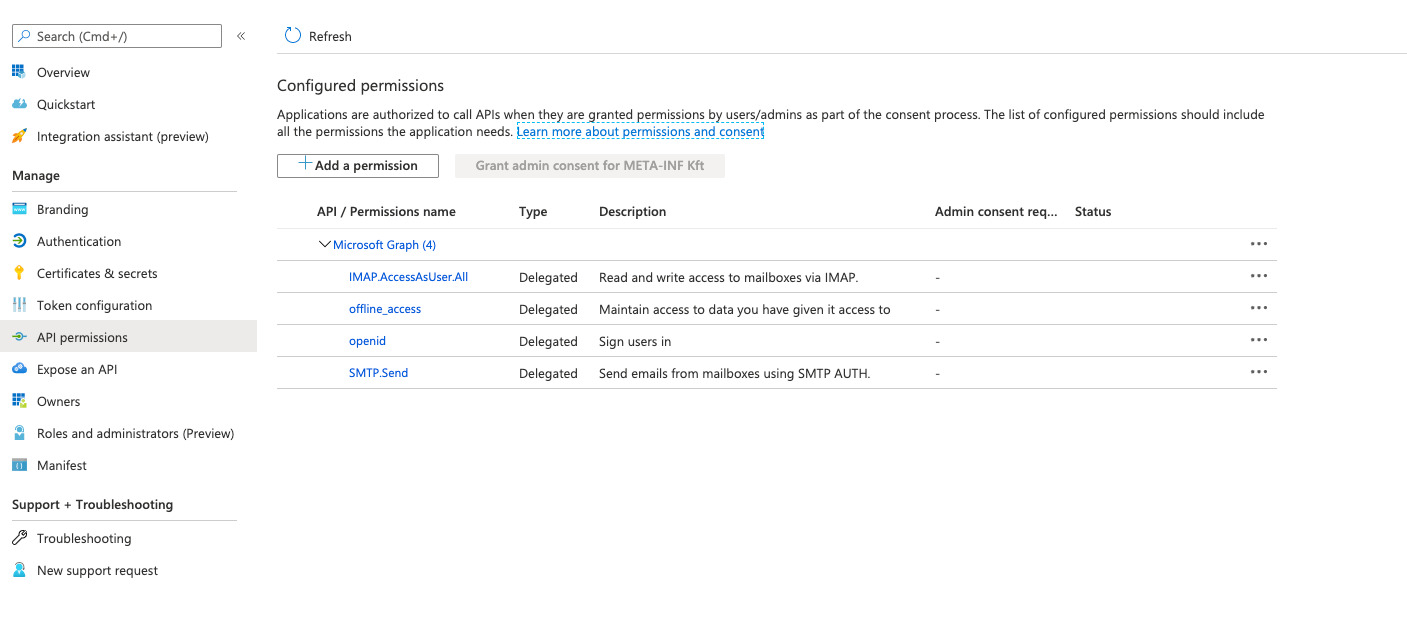
API Permissions (scopes) need to be granted for the application.
Clicking on the Register button your application is being created instantly. On the overview page of your newly created app select the API permission menu:
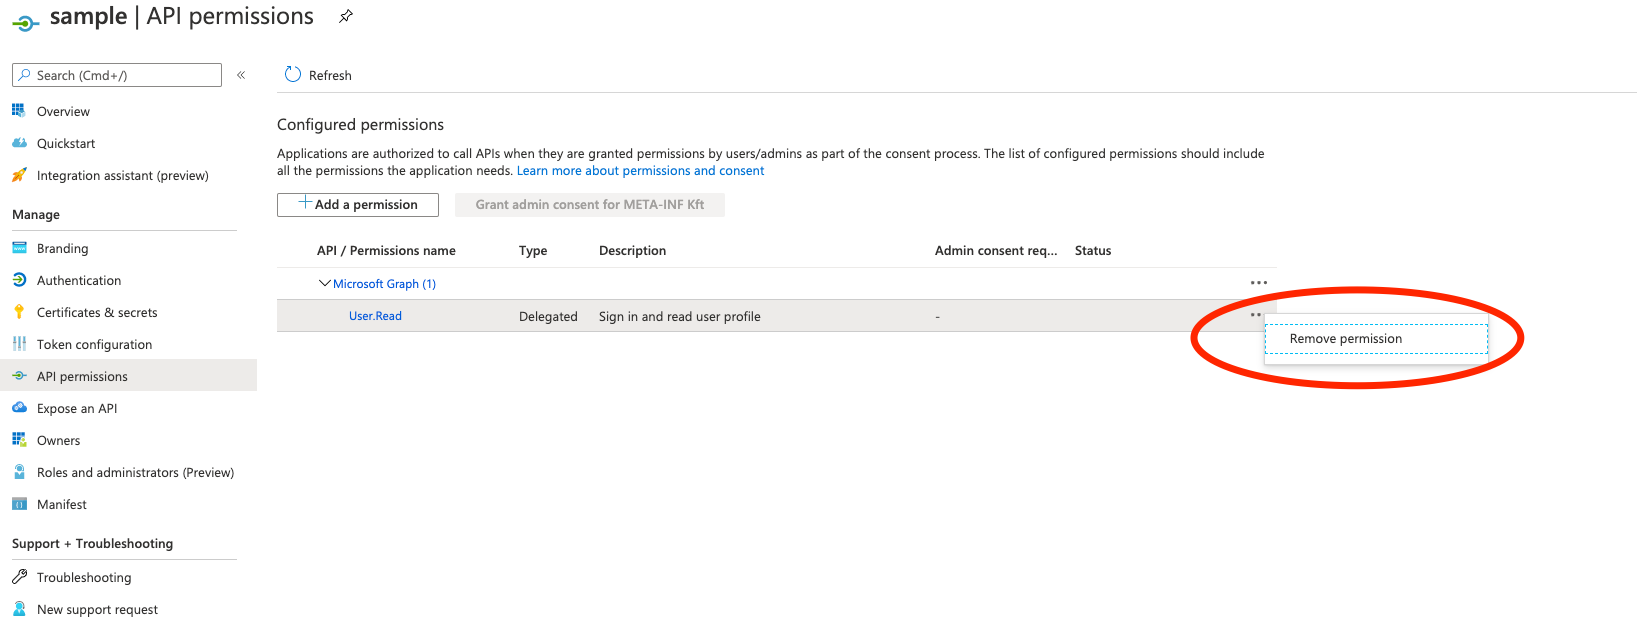
To achieve this list of permission for your app do the following. First, remove the User.read permission added as a default by the portal:
To add a permission (scope) click on the Add a permission button and select the Microsoft Graph API:
.png?version=1&modificationDate=1603639274599&cacheVersion=1&api=v2)
Select the Delegated permissions then find and select the permissions.
Depending on your actual use case (i.e. the used messaging/communication protocol), the following permissions shall be added
General Permissions
General permissions needed to acquire a refresh token (i.e. these are required in each and every use case)
.png?version=1&modificationDate=1603639274414&cacheVersion=1&api=v2)
IMAP Permissions
Permissions to use the IMAP protocol. In the filtering field provide the search term “imap”:
.png?version=1&modificationDate=1603639274115&cacheVersion=1&api=v2)
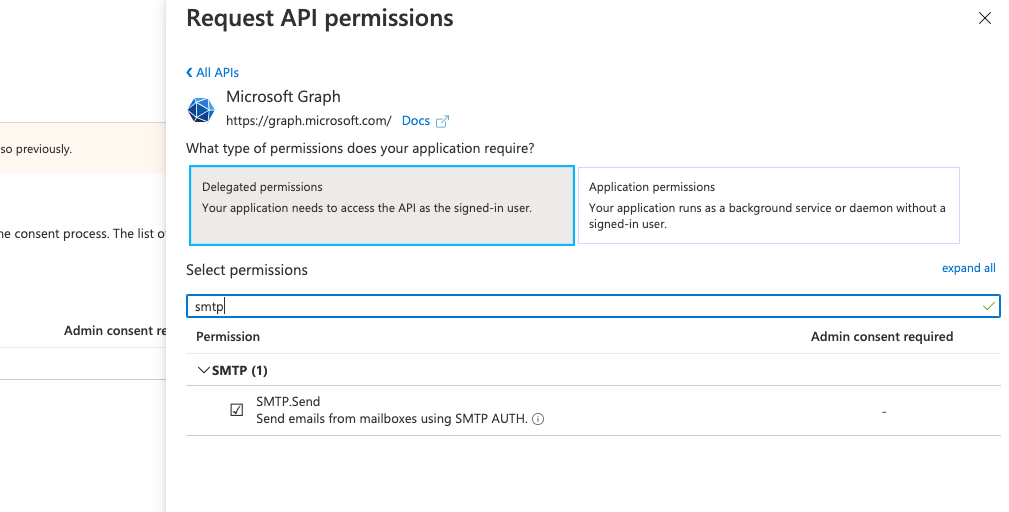
SMTP Permissions
Permissions to use the SMTP protocol. You can find the permission for SMTP by entering “smtp“ in the search field:
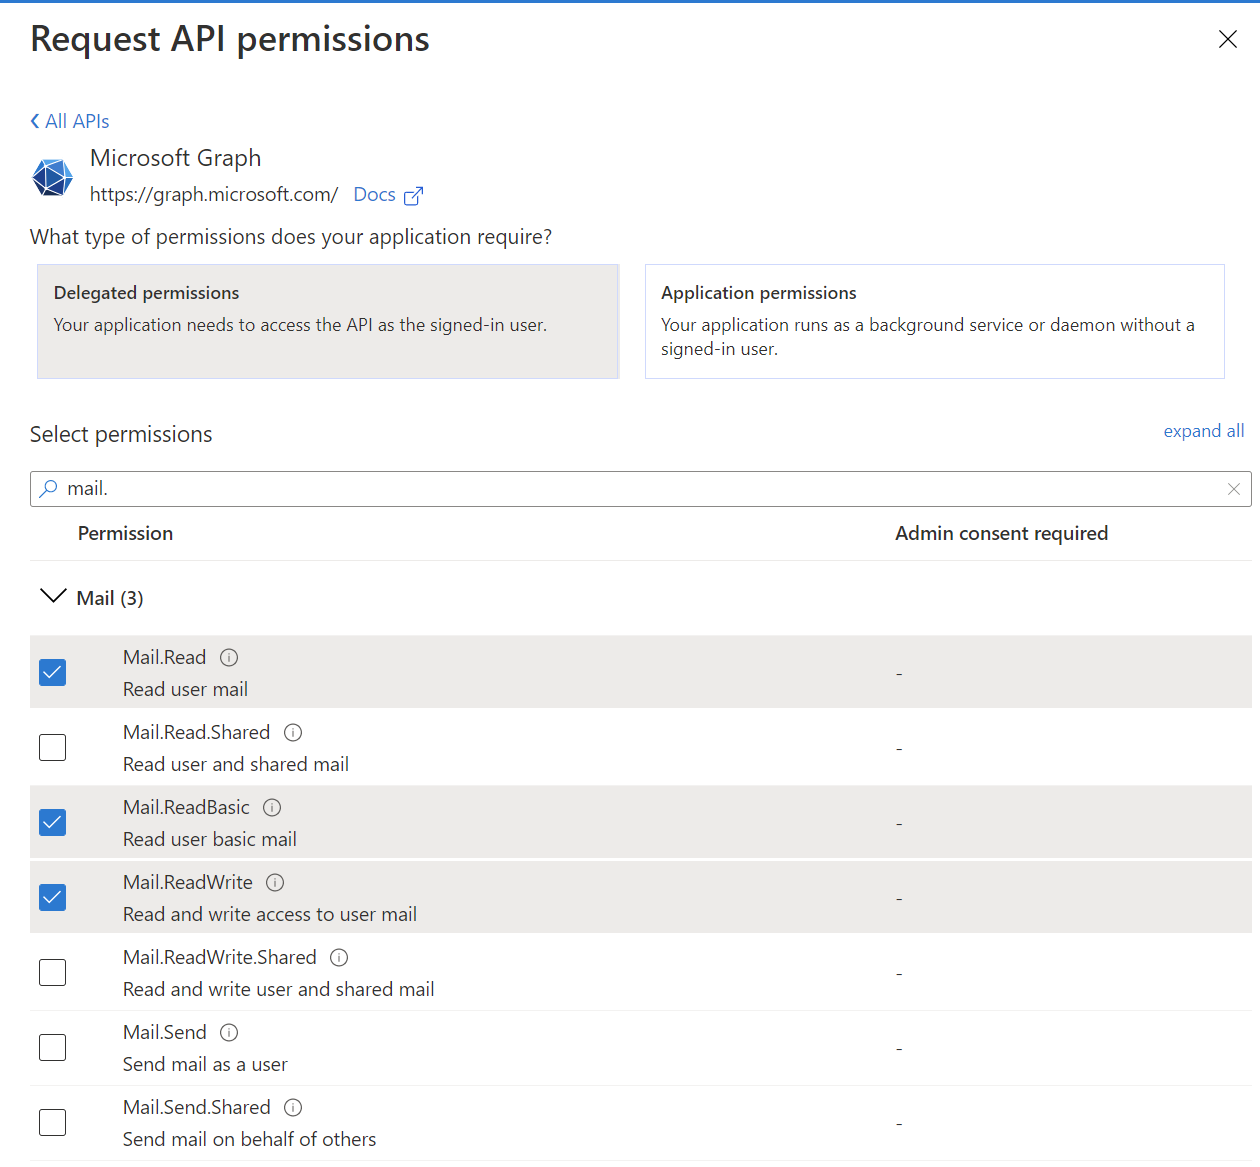
Graph API Permissions to fetch emails
Permissions to use Graph API for incoming connection (to fetch messages).
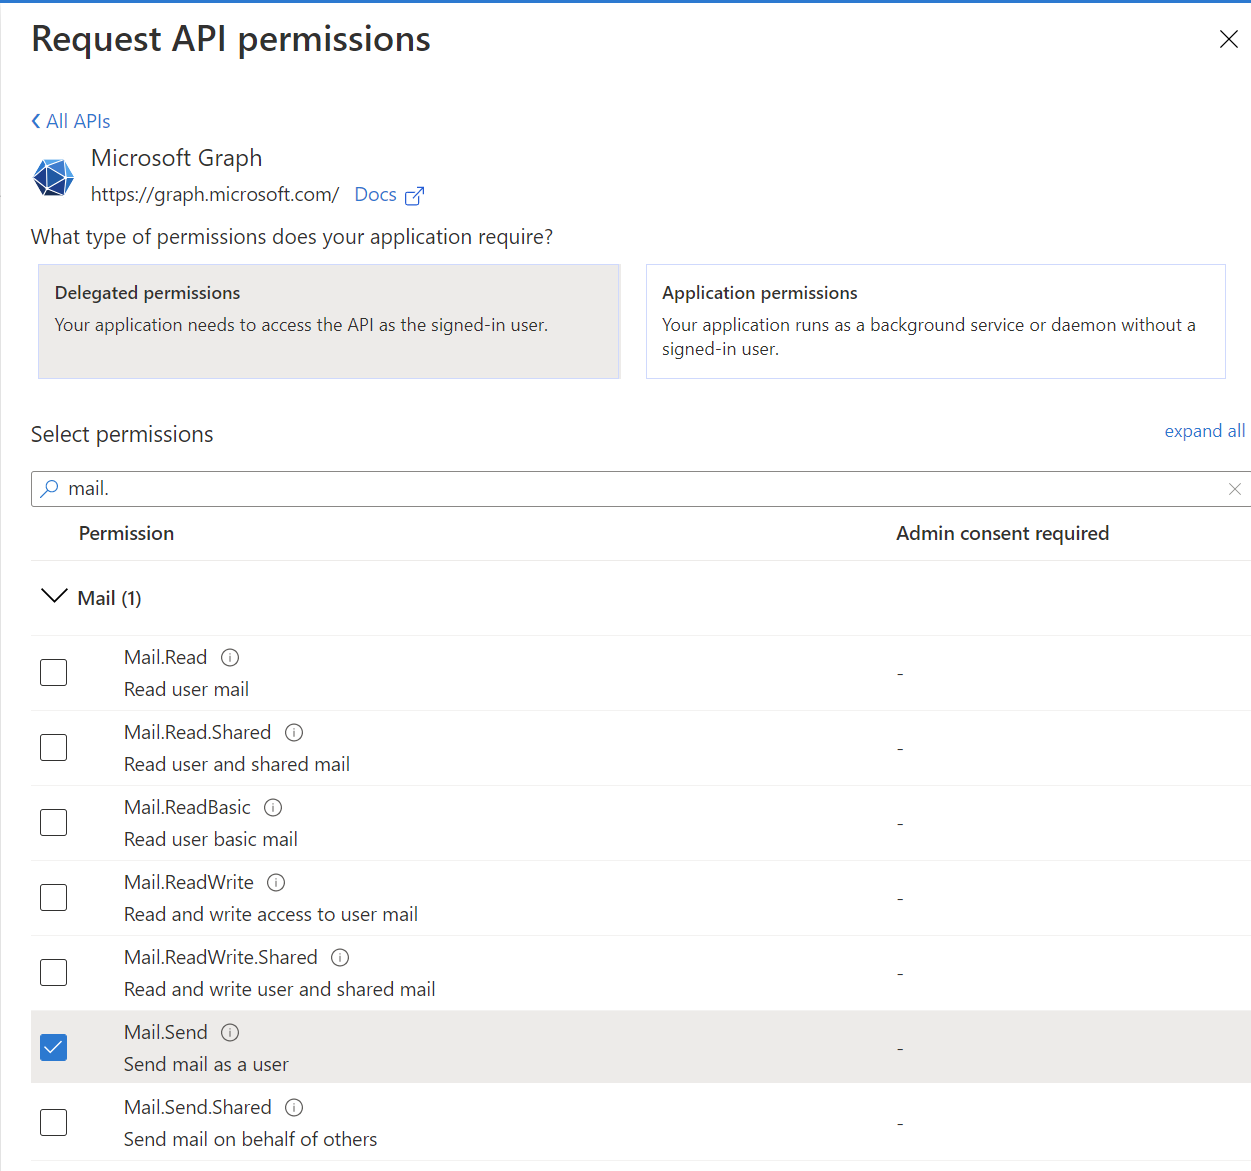
Graph API Permissions to send emails
Permissions to use Graph API for outgoing connection (to send messages)
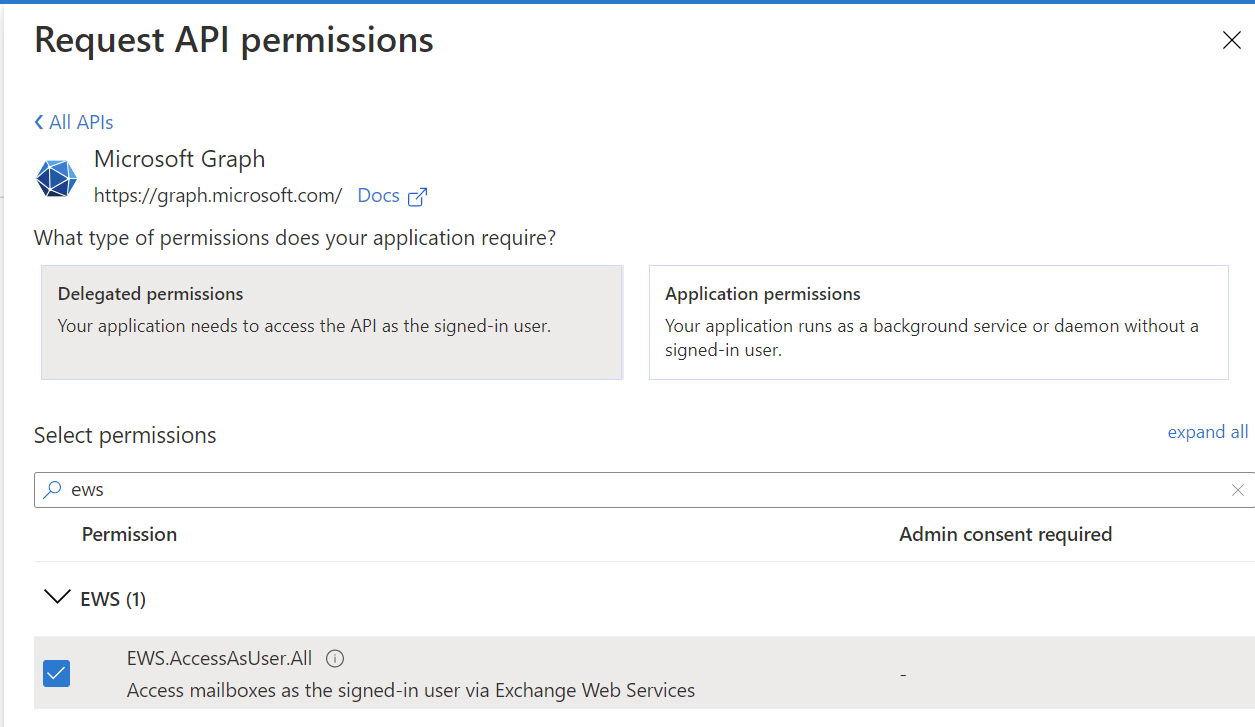
| Note |
|---|
Currently, the Graph API does not yet support sending messages in MIME format, therefore we use the EWS implementation under the hood. See permission settings for EWS below |
Exchange Web Services permissions to send emails
Permissions to use EWS (Microsoft Exchange Web Services) for outgoing connection (to send messages)
General notes:
The selections are retained between filtering so as soon as you have selected all the permissions, you can add them together clicking on the “Add permissions” button at the bottom. This enables you to mix and mingle any permission scopes within an app registration and expose them via a client secret.
On the other hand, this also means that if you want to use separate mailboxes (email addresses) for different tasks, you only need to configure and grant the permissions required for that functionality only (e.g. to configure a mailbox to use with Graph API, you don’t need any permissions related to SMTP or IMAP protocols). You also have the possibility to differentiate between incoming and outgoing connections, i.e. you can create an app registration (and a respective client credential) to configure a mail handler with, while you can create another registration to use for message sending only. In other words, the concept of mail providers allows for granular use and definition of permission scopes and the respective client credentials representing them.
In the Microsoft365 world, within a tenant, you can have several app registrations (with diverging configuration) for the very same account (mail address), while you can use different accounts (mail addresses) within a tenant to implement different tasks (also with individual app registrations for each). There is also the possibility to create a multi-tenant app registration if there is a demand for accessing a mailbox from different tenants (i.e. organizations/companies/departments/etc.) or even with external addresses.
How you want to organize your access and permission scheme is at your choice.
Step 5 - Generate client secret
Generate a client secret to be used in client credentials. Select the Certificates & secrets menu
.png?version=1&modificationDate=1603639274008&cacheVersion=1&api=v2)
and click on the New client secret button to create a new client secret.
.png?version=1&modificationDate=1603639273721&cacheVersion=1&api=v2)
add a description and select the expiration date that fits your needs and click on Add.

Don’t forget to copy the client secret and provide it to the configuration part together with the client id from the Overview page of the app

Step 6 - Copy
authorisation adn token endpoints to the appEndpoints URIs
Adding the authorisation and token endpoints from the Microsoft app to the Client Credentials in Email This Issue. Without doing this you need to pay attention to finding and applying these endpoint URIs.
In the case of Microsoft 365 Oauth2, the authorisation and token endpoint are different for multi and single tenant configurations. For the single-tenant configuration, they are unique for each tenant. As a consequence, you must provide them on the OAuth2 Client Credentials dialog.
For both the multi and single tenant configuration you find this information on the Overview page of the registered application selecting the Endpoint menu on the top as it is shown on the following screenshot:

You can easily copy and paste both of them.
Removing the consent
In case you want to revoke the permission from the registered application to authenticate on behalf you just visit https://myapps.micorsoft.com/ and delete the registered application from the list.
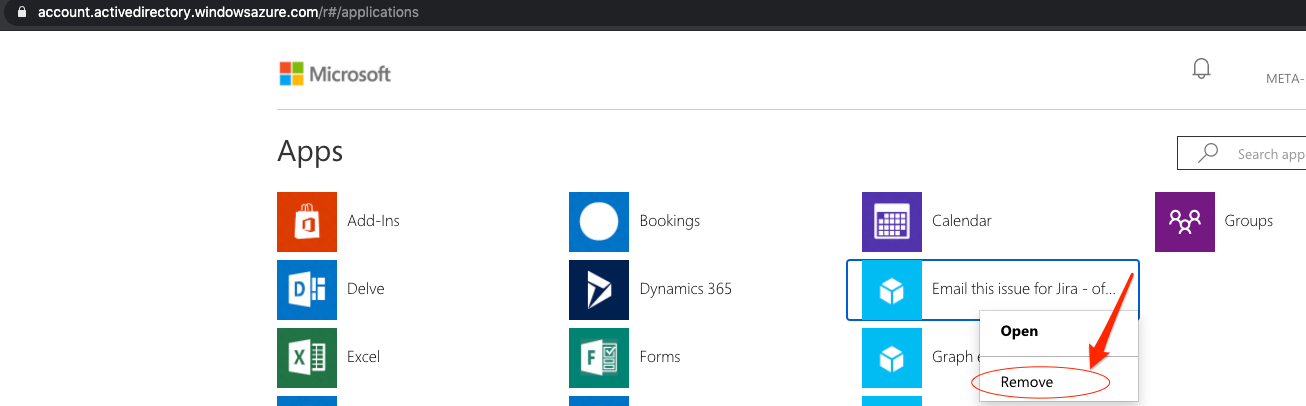
The released access token still will be valid within the validity period of it, only the refreshing of the access token will fail for this specific account. The application registration is untouched and other accounts can continue to use it.
On this page | ||||
|---|---|---|---|---|
|