| Redirect | ||||||
|---|---|---|---|---|---|---|
|
| Note | ||
|---|---|---|
| ||
Thank you for visiting our old product documentation site. Note that weare in the process of migrating our product documentation and soon we will notno longer store or update our documentation here.Please navigate to our new documentation site and update your bookmarks accordingly. If you're looking for the former content of this page, click here. |
| Table of Contents |
|---|
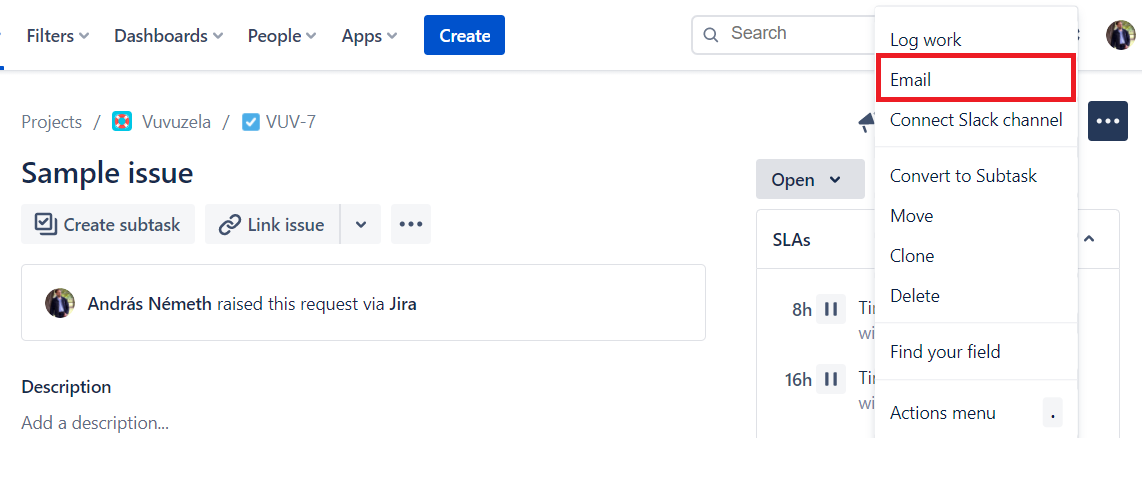
One of the most important features of Email This Issue is the ability to send ad-hoc or manual emails right from the issues in Jira. If the Email option is available in the issue view → Actions menu, the users are authorized to send manual emails.
Email Screen
The email screen aims at providing an easy-to-use email composition interface while keeping users in context with the issue.
The screen is divided into two columns:
- the left column is dedicated to composing emails
- the right column displays issue details so that users may refer to issue fields easily

The left-hand side email panel offers a lot of features to compose emails. Recipients, email subject, message body, attachments may be added to the emails.
Recipients
Emails may have To, Cc and Bcc recipients. For all of these recipient types you can enter or select.
- users from Jira
- email addresses
- Individuals related to the issue or project: Assignee, Reporter, Watchers, Project Lead, Current User
- Project Roles
- User Groups
- Custom Fields that may hold email addresses or users or groups

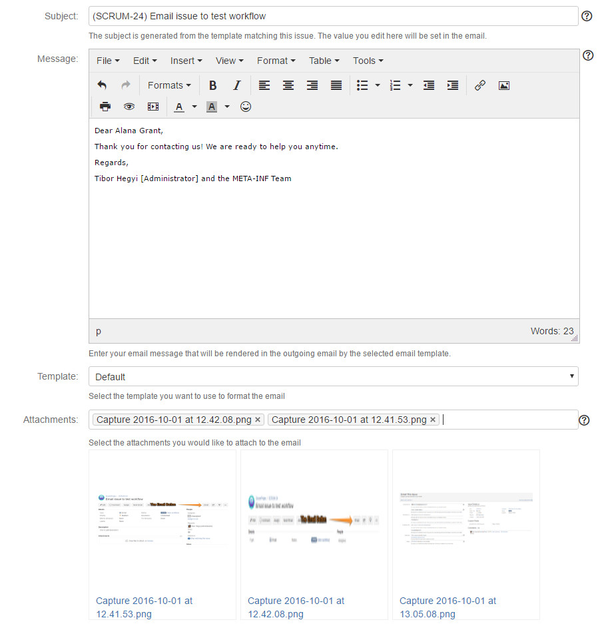
Email Content
The key attributes to specify email content are:
...
here |
...
. |
...
Rather, the message will be combined into the selected template to renderd the final layout and content of the Body of the email.
Feel free to select another template and click Preview to verify the the final email's look and content.
Email This Issue's Rich Text Editor is available for HTML emails. The Editor offers lots of features, such as full screen editing and WYSIWYG formatting.
...
The template selected here will be used to render the Body of the email with static and dynamic content.
The preview button is useful to verify how the email will look.
note: Email This Issue uses the browser's built-in spell checker. So if you want spell checking, enable it in the browser.
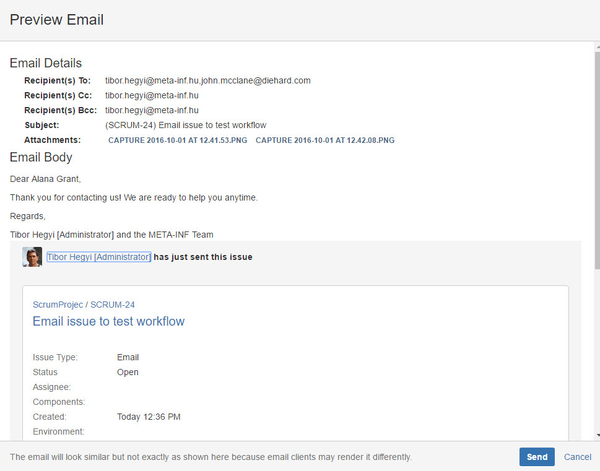
Email Preview
The Preview button opens the email in a dialog so that you can verify the content and layout of the email before actually sending it. It is possible to send the email directly from the the preview dialog.
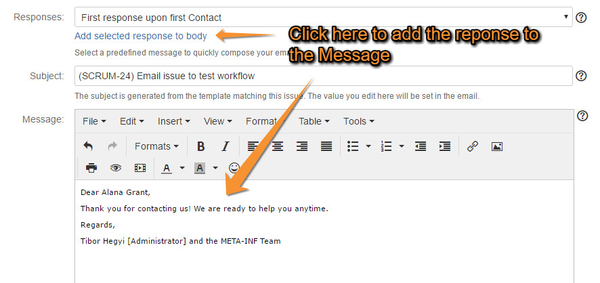
Canned Responses
Default Messages (Canned Responses) are predefined default email messages that you can add to the email body with a click of a button. Responses help users avoid typing long, standard messages to recipients.
Responses may render issue details dynamically into the Message. The below example adds a message dynamically rendering the issue reporter's full name in greetings and the current users's name in the signature.
Issue Panel
The right hand side issue panel display issue details with all system and custom fields and the list of comments as well. This helps users remain in context with the issue they are sending in email.

| Note |
|---|
Please note that in case of Service Management Requests, only public comments are visible on the Issue Panel |
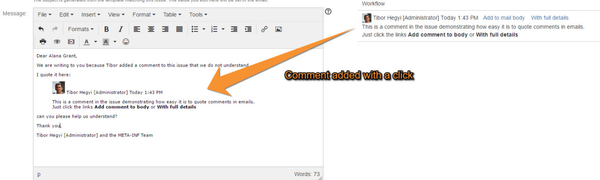
Add Comments
The comments in the issue panel may be easily quoted in the email message. The links "Add to mail body" and "With full details".
The former will add the comment text to the cursor position in the Message field. The latter will enhance it with comment details like author and date/time the comment added.
Screen Help
The Email screen is prepared to give users detailed instructions how to use it. ![]() icons are displayed next to the fields. Clicking the icon, a small popup help will open and explains what the fields are used for.
icons are displayed next to the fields. Clicking the icon, a small popup help will open and explains what the fields are used for.
...